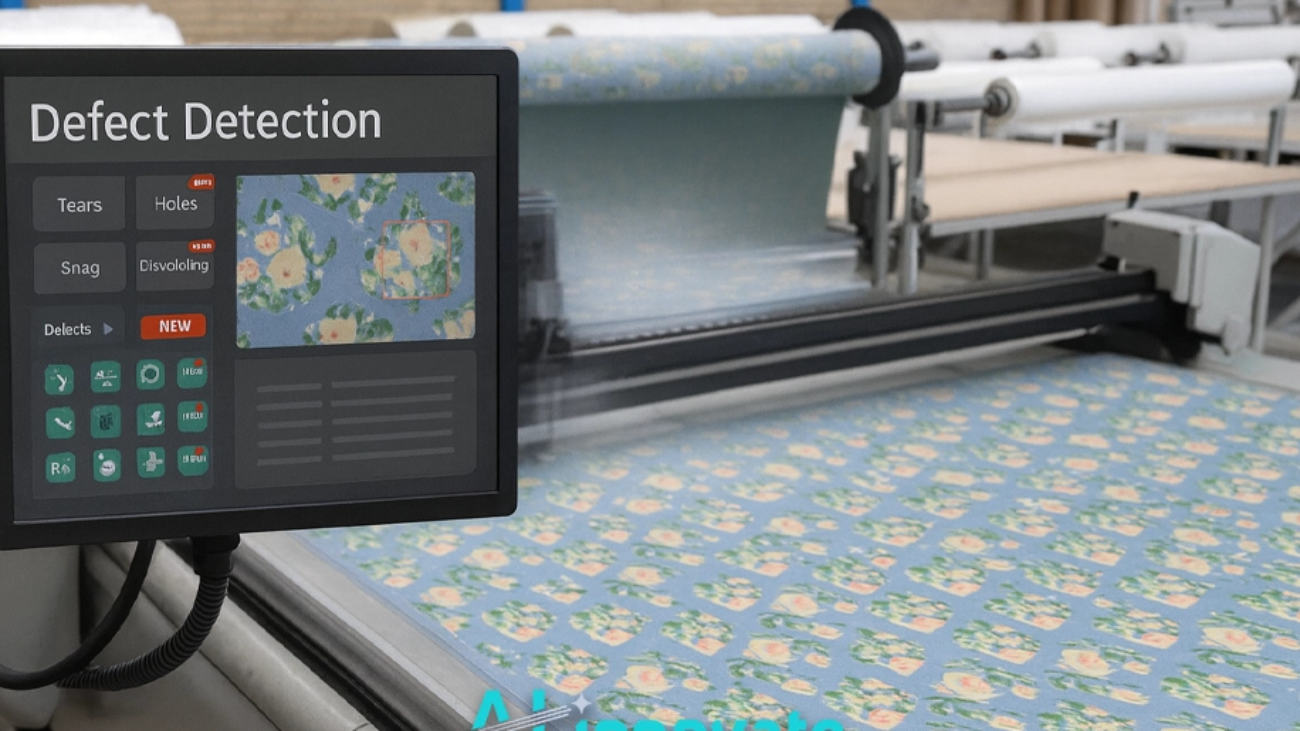
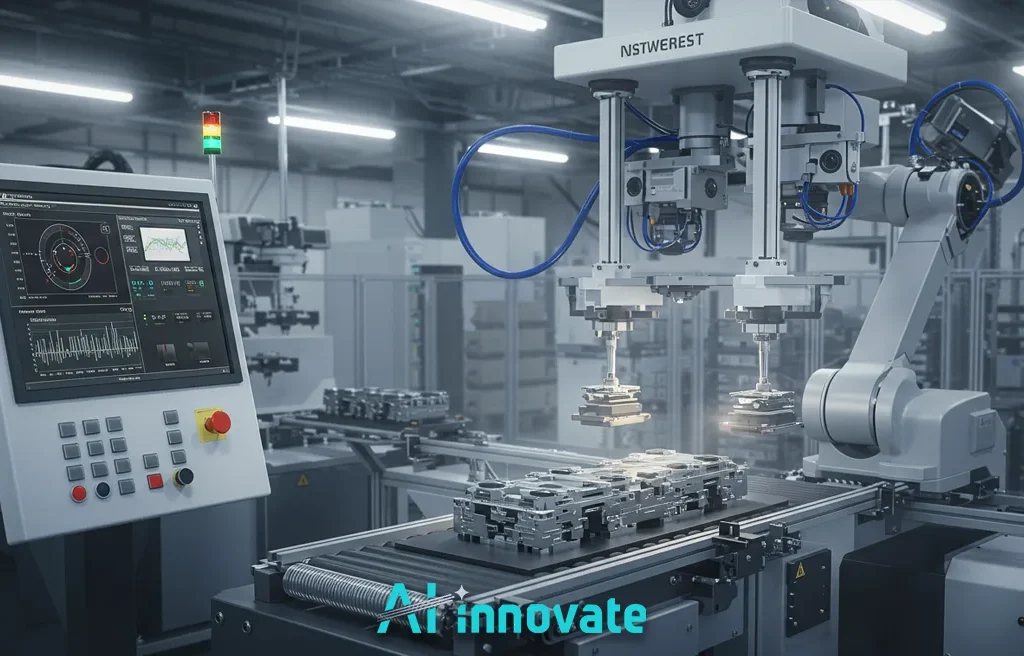
Textile Defect Detection

Textile Defect Detection – AI Tools for Zero Defects

The modern textile industry operates on a challenging premise: delivering flawless products at a scale and speed that often exceeds human capability for quality assurance. This creates a critical vulnerability where minor material flaws can lead to significant financial loss and brand erosion.

At AI-Innovate, we bridge this gap by engineering intelligent, practical software that addresses these real-world industrial challenges head-on. This article provides a data-driven technical analysis of automated Textile Defect Detection, moving from foundational concepts and performance benchmarks to global integration strategies and the tools that accelerate development in this transformative field.

Detect the Smallest Flaws . Deliver Flawless Fabric.

Eliminate defects, boost production efficiency, and achieve consistent textile quality , all with zero manual intervention.

Quantifying the Manual Inspection Bottleneck

Before embracing automation, it is crucial to understand the clear, quantifiable limitations of manual inspection. The reliance on human operators introduces inherent variability and a ceiling on efficiency that advanced manufacturing cannot afford.

Decades of practice show that while expertise is valuable, it cannot overcome fundamental human constraints in speed, endurance, and perceptual accuracy. To truly appreciate the shift towards automation, it is essential to examine the tangible data points that define this bottleneck:

  • Speed Limitation: A human inspector’s focus wanes significantly after 20-30 minutes, capping effective inspection speeds at a maximum of 20-30 meters of fabric per minute.
  • Accuracy Decay: While the theoretical maximum detection rate for manual inspection is around 90%, real-world performance in factories often drops to an average of 65% due to fatigue and environmental factors.
  • Waste Generation: On an industrial scale, these inefficiencies contribute to staggering waste. The textile industry generates roughly 92 million tons of waste annually, with an estimated 25% of it occurring during the production phase alone, much of it related to undetected or late-detected defects.

Read Also: Defect Detection in Manufacturing – AI-Powered Quality

Machine Vision in Micro-Defect Analysis

Automated systems transcend human limitations by leveraging machine vision for defect detection, a field that combines high-fidelity imaging with sophisticated analytical models. These systems don’t just mimic human sight; they enhance it to a microscopic level of precision, operating tirelessly at speeds that match modern production lines. The power of this technology stems from two key advancements that work in concert:

High-Resolution Imaging Technologies

The process begins with capturing a perfect digital replica of the fabric. Systems often employ high-resolution industrial cameras—some using sensors as powerful as 50 megapixels—to scan the entire width of the material as it moves.

Paired with controlled, high-intensity lighting, this setup captures minute details, creating a data-rich image that serves as the foundation for analysis. This process ensures that even the most subtle variations are visible to the AI.

The Role of Convolutional Neural Networks

Once an image is captured, the analytical heavy lifting is performed by deep learning models, most notably Convolutional Neural Networks (CNNs). Models like YOLO (You Only Look Once) and custom-architected CNNs are trained on vast datasets containing thousands of examples of both flawless and defective fabric.

They learn to identify complex patterns, including subtle defects like knots, fine lines, small stains, loose threads, and color inconsistencies that are often imperceptible to the human eye, making robust textile defect detection a reality.
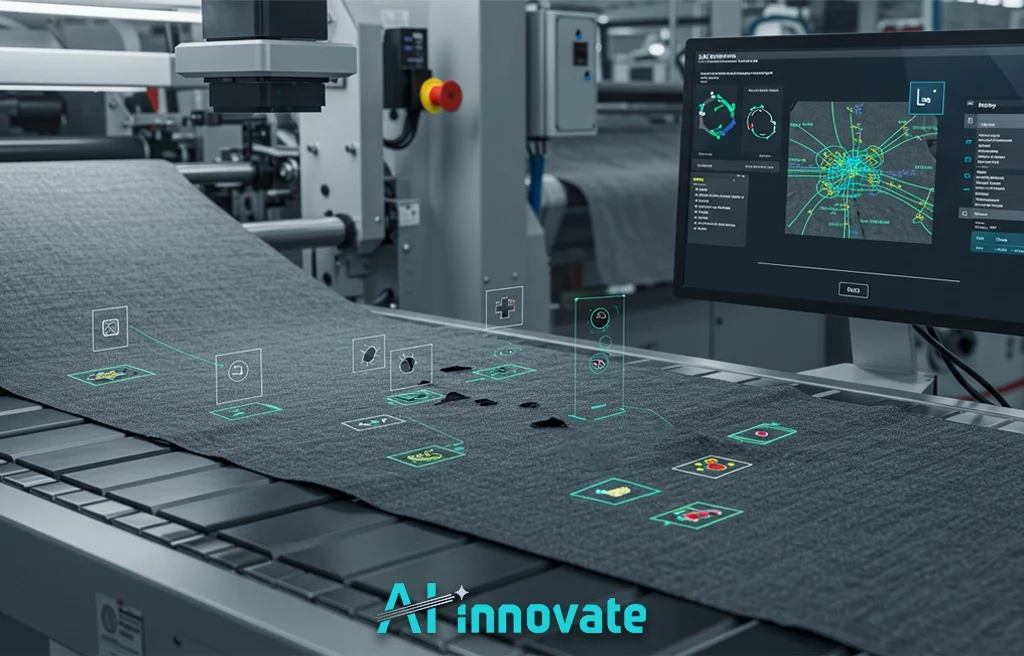
Machine Vision in Micro-Defect Analysis

Benchmarking Detection Model Performance

The theoretical promise of AI is validated by measurable performance benchmarks from various real-world and experimental models. For QA Managers and Operations Directors, these metrics provide the tangible evidence needed to justify investment, demonstrating a clear and reliable return.

For technical teams, they offer a baseline for what is achievable. The data below, gathered from multiple studies, highlights the efficacy of different models on specific datasets.

Model Name Accuracy / Performance Metric Defect Types / Dataset Context
AlexNet (Pre-trained) 92.60% Max Accuracy General classification of textile defects in simulations.
YOLOv8n 84.8% mAP (mean Average Precision) 7 defect classes on data from an active textile mill.
DetectNet (Pre-trained) 93% and 96% Accuracy (two models) Distinguishing between defective and non-defective fabric.
Custom VGG-16 73.91% Accuracy Defects on pattern, textured, and plain fabrics.
“Wise Eye” System >90% Detection Rate Over 40 common types of fabric defects in lace.

Global Perspectives on System Integration

The adoption of automated inspection is not a localized trend but a global industrial movement, with distinct initiatives and success stories emerging worldwide. This widespread implementation underscores the technology’s maturity and its role as a new standard for quality control in competitive markets. The following examples showcase how different regions are leveraging this technology.

Success Stories from Asia

In China, integrated systems like “Wise Eye” are already making a significant impact. Capable of identifying over 40 common fabric defects with a detection rate exceeding 90%, this system has been shown to boost production capacity by 50% in lace factories by improving the inspection accuracy from the manual rate of 65% to an automated rate of 91.7%. This demonstrates a fully-realized solution deployed at scale.

European Industrial Initiatives

In Europe, the focus extends to both implementation and strategic enablement. Germany’s government has launched initiatives like “Mittelstand 4.0 Kompetenzzentrum Textil vernetzt” to help small and medium-sized textile enterprises adopt digitalization and AI to remain competitive.

Simultaneously, research consortia are driving innovation. A project by Eurecat and Canmartex in Spain uses photonics and AI not just for detection but for prediction, aiming to reduce manufacturing flaws by over 50%, directly addressing waste and sustainability. This highlights a mature understanding of AI as a tool for proactive process optimization. This is a core part of advanced textile defect detection.

Read Also: Fabric Defect Detection Using Image Processing

Accelerating Vision System Prototyping

For Machine Learning Engineers and R&D Specialists, a primary obstacle to innovation is the reliance on physical hardware. The process of acquiring, setting up, and testing with expensive industrial cameras creates significant delays and budget constraints.

This hardware-dependent cycle limits the ability to experiment with different setups and rapidly iterate on new models. At AI-Innovate, we recognize that true agility comes from decoupling software development from physical hardware constraints.

The solution lies in robust simulation. By using a “virtual camera” or camera emulator, development teams can test their vision applications in a purely software-based environment. This approach unlocks several key advantages for development teams:

  • Accelerated Development: Test ideas and validate software in hours, not weeks.
  • Reduced Costs: Eliminate the need for expensive upfront hardware investment for prototyping.
  • Enhanced Flexibility: Simulate a wide range of camera models, lighting conditions, and defect scenarios that would be impractical to replicate physically.
  • Seamless Collaboration: Enable remote teams to work on the same project without needing to share physical equipment.
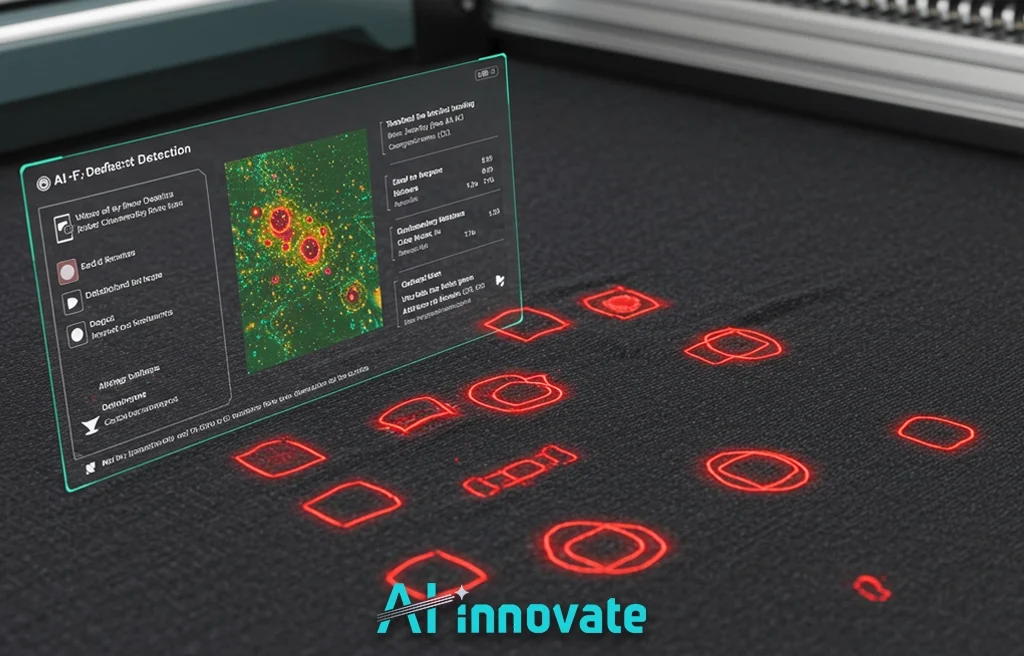
Accelerating Vision System Prototyping

From Insight to Industrial Application

Understanding the data, the technology, and the global trends is the first step. The next is translating that knowledge into a reliable, high-performance system on your own factory floor. This requires a partner with deep expertise in both industrial processes and applied artificial intelligence.

Our solutions are designed to turn these insights into action. For Operations Directors, our AI2Eye system delivers a complete, real-time quality control solution that reduces waste and boosts efficiency.

For R&D specialists, our AI2Cam virtual camera emulator empowers your team to innovate faster and more affordably. Contact our experts to discover how we can tailor these tools to your specific operational needs.

Conclusion

Automating quality control is no longer a futuristic concept but a present-day competitive necessity for the textile industry. By moving beyond the inherent limitations of manual inspection, manufacturers can achieve unparalleled levels of efficiency, quality, and waste reduction. A well-implemented strategy for Textile Defect Detection is a direct investment in brand reputation and operational excellence.

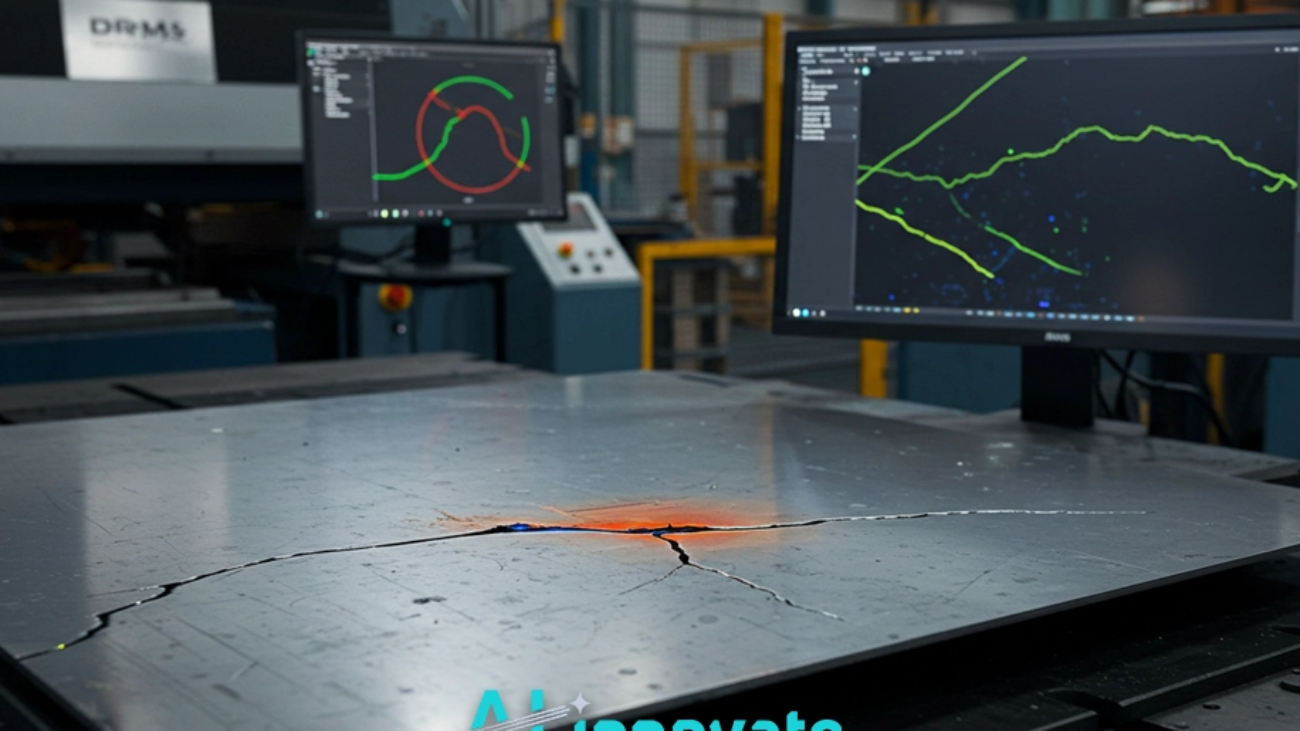
Surface Crack Detection with Deep Learning

Surface Crack Detection with Deep Learning – Revolutionizing Quality Control

The structural integrity of industrial components and civil infrastructure is paramount to operational safety and economic stability. While traditional inspection methods have served us for decades, they are increasingly unable to meet the demands for speed, accuracy, and scalability required in modern industry.

At AI-Innovate, we bridge this gap by engineering practical AI solutions that address these critical challenges. This article provides a comprehensive technical analysis of Surface Crack Detection Using Deep Learning, exploring the core technologies, model performance metrics, and real-world industrial applications that are defining the future of automated quality assessment.

Next-Level Surface Crack Detection Starts Here

Let AI detect, analyze, and classify surface cracks using Deep Learning — smarter, faster, and more accurately than ever.

The Imperative for Automated Structural Assessment

The reliance on manual inspection for surface defect detection is fraught with inherent limitations that directly impact a company’s bottom line and safety record. Human inspectors, no matter how skilled, are susceptible to fatigue, subjective judgment, and physical limitations, leading to inconsistent and often slow assessments.

This manual process is not only labor-intensive and expensive but also poses significant risks in hazardous environments like pipelines or large-scale constructions. The transition to automated systems is no longer a luxury but a strategic necessity.

By automating inspections, industries can implement continuous, objective monitoring that drastically reduces error rates, minimizes production downtime, and creates a safer working environment for personnel.

Convolutional Neural Networks as Digital Inspectors

At the heart of modern automated inspection are Convolutional Neural Networks (CNNs), a class of deep learning models designed to process and analyze visual data with remarkable proficiency.

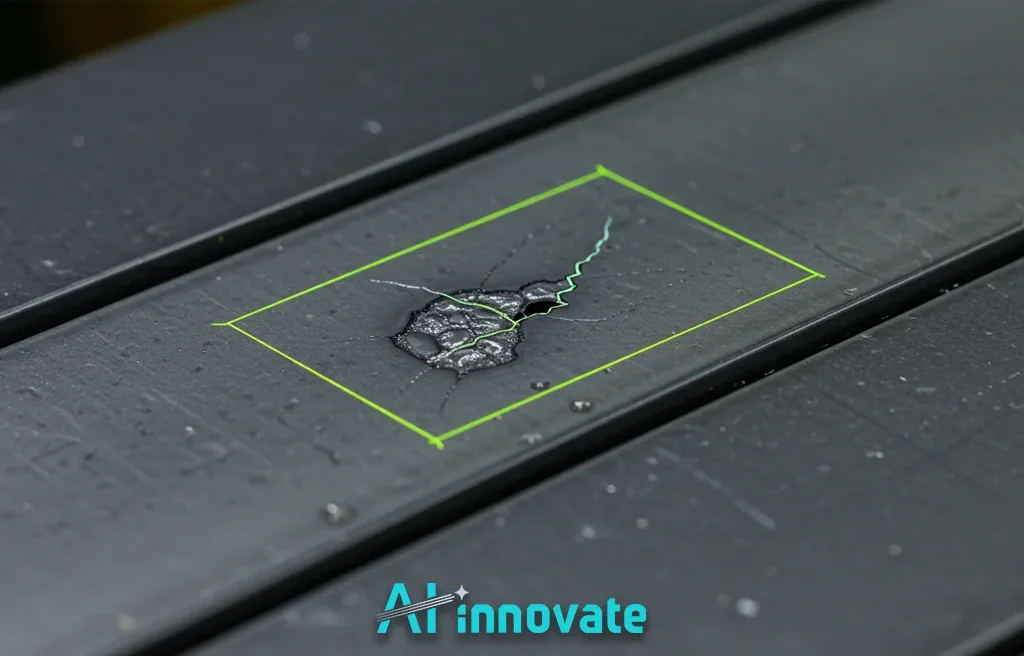
Inspired by the human visual cortex, CNNs automatically learn to identify intricate patterns and features directly from images. Instead of being explicitly programmed to find specific types of cracks, a CNN learns the defining characteristics of a defect—its texture, shape, and orientation—by analyzing thousands of example images.

This process enables the model to identify flaws with a high degree of accuracy, even when faced with variations in lighting, surface material, or camera angle. To better understand their function, the operational flow of a CNN can be broken down into these core stages:

  • Image Ingestion: The network receives a raw pixel image as its primary input.
  • Hierarchical Feature Extraction: Through a series of convolutional and pooling layers, the network progressively extracts features, starting from simple edges and textures and building up to complex patterns that signify a crack.
  • Classification or Localization: A final set of layers processes these features to either classify the entire image as “cracked” or “uncracked,” or to precisely locate the crack within the image.

Read Also: Surface Defect Detection Deep Learning – End Human Error

Convolutional Neural Networks as Digital Inspectors

Comparative Model Performance and Precision

The effectiveness of any deep learning system is measured by its performance. Different models and techniques yield varying levels of precision, and selecting the right architecture is critical for success.

Research demonstrates that while a standard CNN can achieve a respectable accuracy of 89%, the application of transfer learning—using a pre-trained model like ResNet50 as a starting point—can elevate this performance to 94%, even with limited datasets.

This highlights the power of leveraging existing knowledge to accelerate development. The choice of model architecture has a profound impact on outcomes, making Surface Crack Detection Using Deep Learning a field where technical specificity matters immensely.

For a clearer perspective, the following table compares prominent models based on findings from technical studies:

Model Common Dataset Reported Accuracy / Score Source (Conceptual)
Baseline CNN Public Concrete Datasets 89% Academic Studies
ResNet50 (Transfer Learning) Public Concrete Datasets 94% Academic Studies
Various CNNs 40,000 Image Dataset 88.21% – 98.60% MDPI, arXiv
YOLOv8 Pavement/Infrastructure 0.939 (mAP50-95) Ultralytics

Instance Segmentation with YOLOv8

Modern approaches go beyond simple classification. Models like YOLOv8 perform instance segmentation, a sophisticated technique that not only detects a crack but also outlines its exact shape pixel by pixel.

A system built on YOLOv8 has been shown to achieve a mean Average Precision (mAP) score of 0.939, a testament to its high accuracy in real-world scenarios. This capability is invaluable for quantitative analysis, allowing engineers to calculate the precise area and length of a defect to assess its severity and prioritize repairs.

Dataset Integrity and Preprocessing Efficacy

The adage “garbage in, garbage out” is especially true for deep learning systems. The performance of any model is fundamentally tied to the quality and structure of the data it is trained on.

A widely-used public dataset for this task consists of 40,000 images, each 227×227 pixels, created from 458 high-resolution photographs of concrete surfaces. These datasets must be carefully curated and preprocessed to ensure the model learns relevant features rather than noise.

The preprocessing pipeline involves several key steps that can influence model outcomes, as we outline below:

  • Image Splitting: Datasets are typically divided into training and testing sets, often with an 80/20 or 85/15 split to ensure unbiased evaluation.
  • Grayscale Conversion: Research indicates that converting images to grayscale does not harm performance. Models trained on grayscale images achieved an F1-score of 99.549%, virtually identical to the 99.533% from models trained on full-color RGB images, suggesting color data is not essential for this task.
  • Data Augmentation: Techniques like random rotations, flips, and brightness adjustments are often applied to artificially expand the dataset, making the final model more robust and adaptable to varied real-world conditions.

Comparative Model Performance and Precision

Industrial Adoption in Automotive and Infrastructure

The theoretical power of Surface Crack Detection Using Deep Learning translates directly into tangible value across multiple industries. Leading manufacturers and infrastructure managers are actively deploying these technologies to move beyond the limitations of legacy systems and unlock new levels of efficiency and safety. The practical successes in these fields serve as a clear blueprint for others considering adoption.

Case Study: Automotive Press Shop Inspection

In the highly competitive automotive sector, quality is non-negotiable. Carmaker Audi has implemented a deep learning system in its press shops to inspect sheet metal parts for microscopic cracks.

This AI-powered solution has successfully replaced traditional machine vision software that was often unreliable and sensitive to lighting changes. The new system identifies defects with near-pixel perfection, ensuring that only flawless components proceed to the assembly line, thereby reducing waste and upholding the highest quality standards.

Applications in Civil Infrastructure

The principles of Surface Crack Detection Using Deep Learning are equally transformative for civil infrastructure management. This technology is being used to automate the inspection of bridges, roads, and tunnels, where early and accurate defect detection is critical for public safety.

Furthermore, in the oil and gas sector, automated systems monitor pipelines and storage tanks, identifying potential points of failure before they can escalate into catastrophic incidents, thus optimizing maintenance schedules and preventing costly operational disruptions.

From Model to Manufacturing Line

Translating a successful model from a development environment to a robust industrial application presents its own set of challenges. At AI-Innovate, we provide the tools to bridge this gap:

AI2Eye: Intelligent Quality Control on the Factory Floor

Our AI2Eye system is a complete, real-time quality control solution that brings the power of AI directly to your manufacturing line:

  • Reduces material scrap and product defects.
  • Boosts production throughput and efficiency.
  • Guarantees superior product quality and brand reputation.

AI2Cam: Accelerating Vision Development

For R&D teams, our AI2Cam virtual camera emulator streamlines the entire development lifecycle:

  • Enables rapid prototyping without physical hardware.
  • Reduces costs associated with purchasing and maintaining cameras.
  • Provides the flexibility to simulate countless testing scenarios.

Conclusion

Investing in automated inspection is a strategic imperative for any organization committed to quality, safety, and operational excellence. The continued advancement in Surface Crack Detection Using Deep learning, especially with emerging concepts like Physics-Informed Neural Networks, promises even more intelligent and reliable systems. Our mission at AI-Innovate is to deliver these powerful, practical AI solutions today.
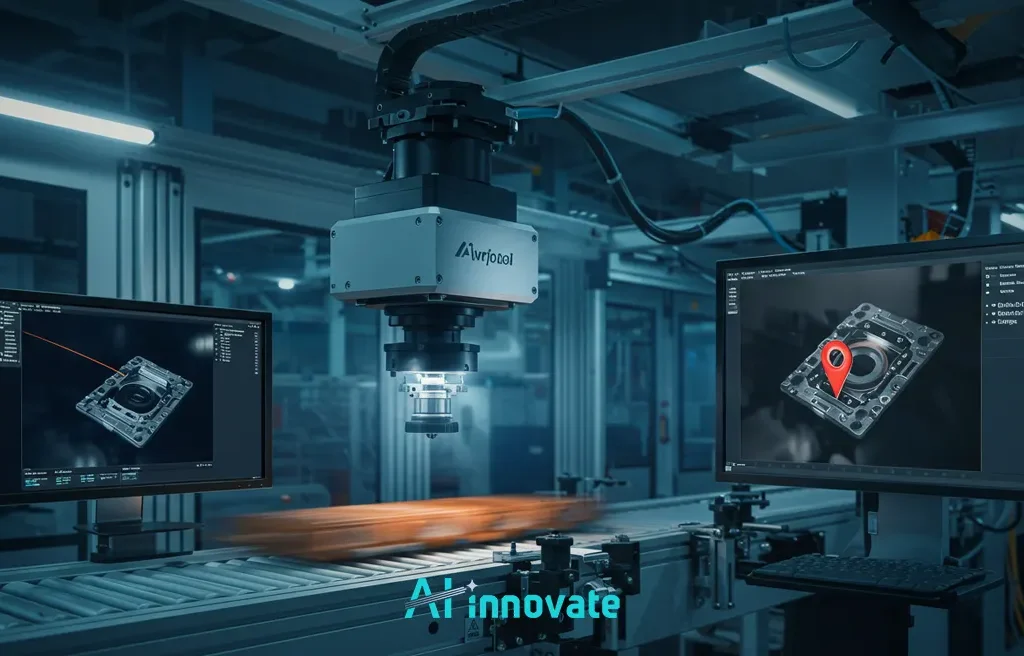
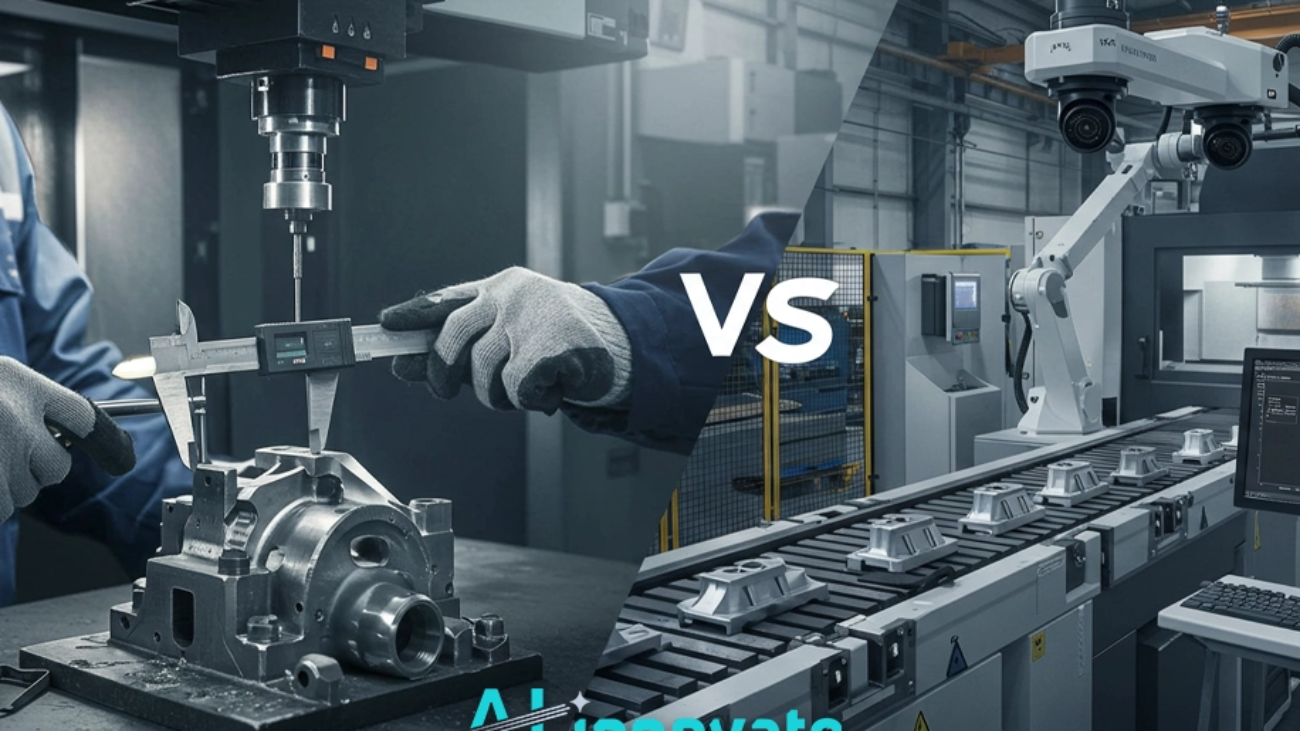
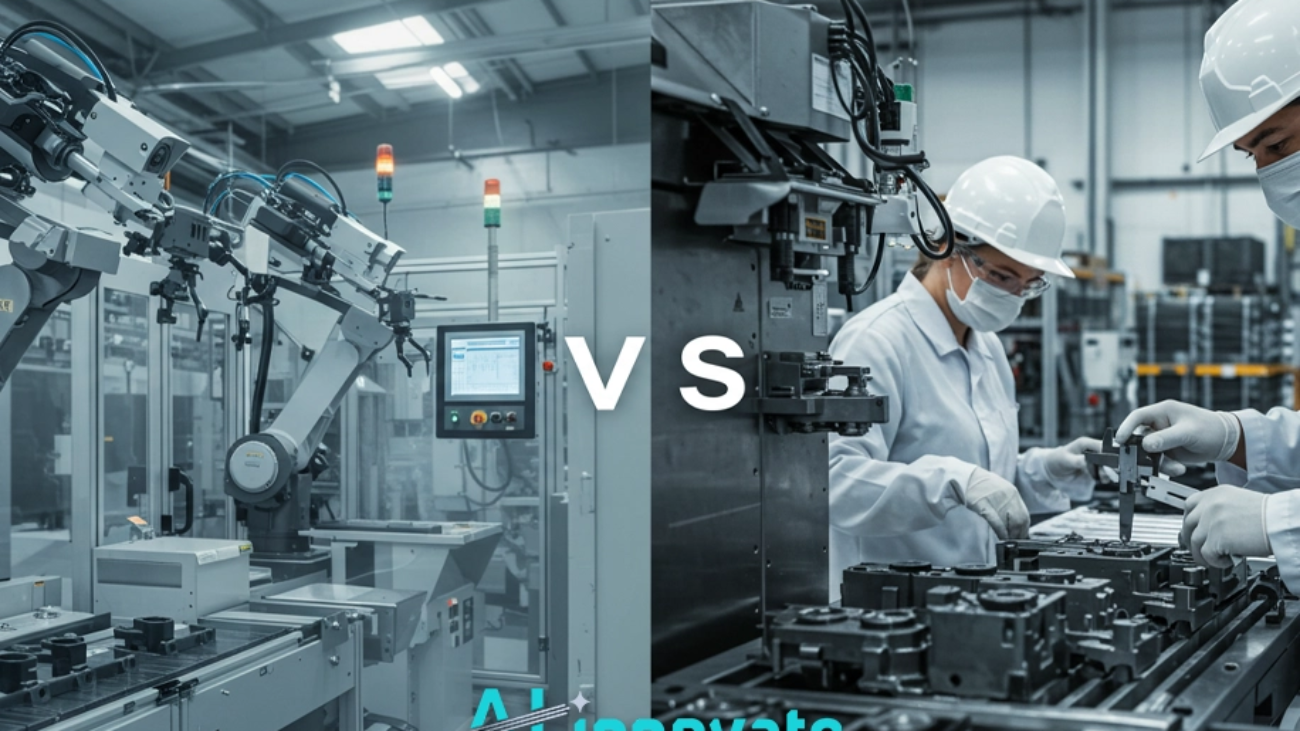
Machine Vision vs Human Inspection

Machine Vision vs Human Inspection – Reliability in Industry

The human eye, for all its adaptability, has non-negotiable physical limits in resolution, spectral range, and consistency. In applications where defects are measured in microns and inspection cycle times in milliseconds, these limits become a critical point of failure. The core of the Machine Vision vs Human Inspection analysis rests on these physical realities of performance under pressure.

Our mission at AI-Innovate is to deliver systems that operate with unwavering precision far beyond these human thresholds. This article delves into the granular, evidence-based metrics of accuracy and reliability, presenting a technical comparison for engineers and QA leaders.

Let Vision Systems Lead Inspection

Precise, automated defect detection at scale.

The Spectrum of Human Vigilance

For decades, human inspectors have been the cornerstone of quality assurance. Their cognitive flexibility and intuitive understanding allow them to identify novel or unexpected defects that fall outside predefined categories—a nuanced capability that is difficult to program.

An experienced inspector can assess contextual subtlety, such as determining if a minor cosmetic blemish is acceptable on one part but constitutes a critical failure on another. However, this expertise is coupled with inherent limitations that become especially apparent in high-volume, repetitive industrial settings. To provide a clearer picture, consider these practical constraints:

  • Fatigue and Inconsistency: Human concentration naturally wanes over a long shift, leading to inconsistent performance and a higher probability of error.
  • Subjectivity in Judgment: What one inspector flags as a defect, another might pass. This variability can lead to inconsistent product quality, impacting customer satisfaction.
  • Scalability Issues: In high-speed production environments, it is often impractical and cost-prohibitive to deploy a large enough team of inspectors to check every single item thoroughly.

The Mechanics of Automated Scrutiny

Automated Scrutiny

Machine vision systems approach quality control from a purely data-driven perspective. These systems are not merely cameras; they are integrated solutions designed for a singular purpose: objective, relentless, and high-speed analysis.

Understanding how they function reveals the core of their advantage in the Machine Vision vs Human Inspection comparison. Let’s delve into their key functional aspects.

Core Components

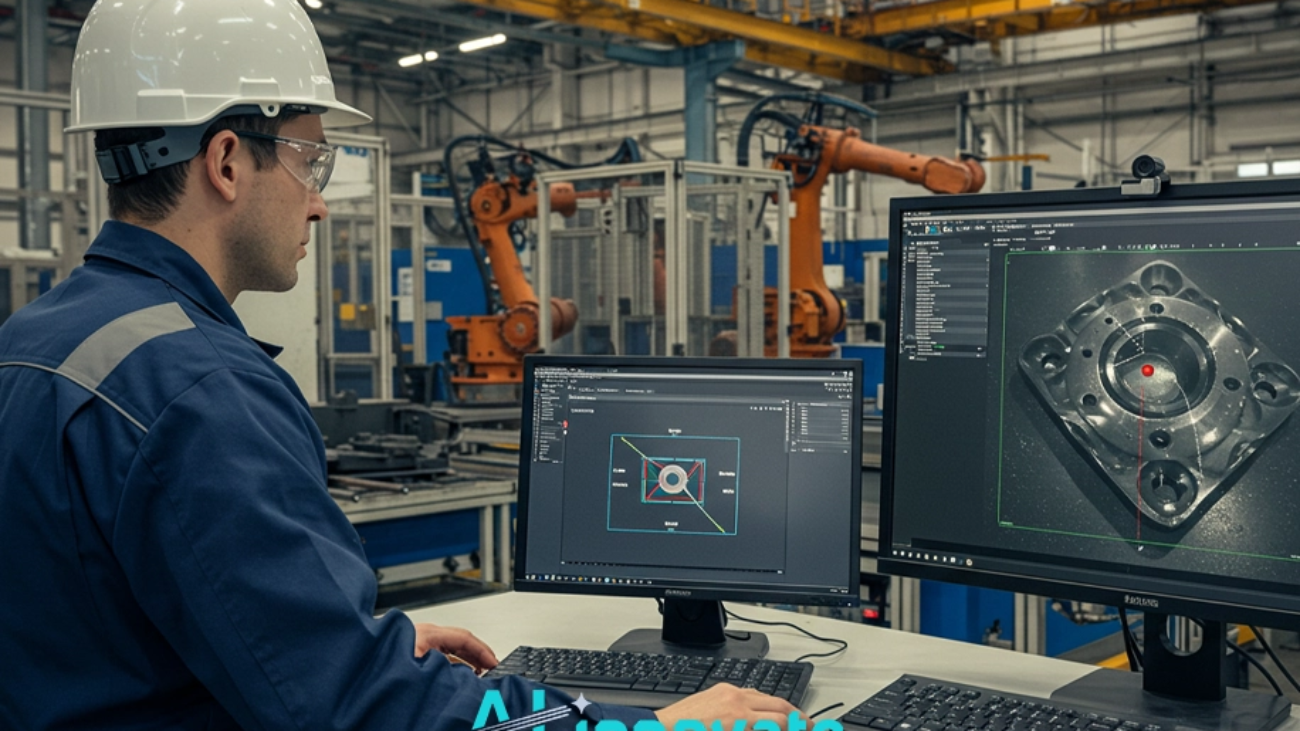
At its heart, a machine vision system is a synergy of hardware. A high-resolution industrial camera captures the image, specialized lighting illuminates the subject to eliminate shadows and highlight features of interest, and a processing unit runs the complex algorithms needed for analysis. Each component is optimized to work in concert, ensuring that the acquired image data is as clear and information-rich as possible.

Operational Principles

Once an image is captured, the software takes over. The system can perform inspections at speeds far exceeding human capability, in some cases processing up to 20 items per second. Using sophisticated algorithms, it can identify defects with microscopic precision, spotting flaws as small as 0.02 mm² that are functionally invisible to the human eye. Crucially, these systems operate with unwavering consistency, 24/7, without any degradation in performance, guaranteeing a uniform quality standard across all production batches.

A Direct Comparison of Core Benchmarks

To make an informed decision between these two methodologies, a direct, evidence-based comparison is essential. The following table breaks down their performance across five critical benchmarks, drawing upon industry data and technical reports to provide a clear, side-by-side view.

Benchmark Human Inspection Machine Vision
Accuracy Variable, typically averages between 80-85% under optimal conditions and declines with fatigue. Consistently high, can reach over 98% accuracy for trained defect types
Speed Limited by human cognitive and physical speed; averages a few items per minute. Extremely high; capable of inspecting multiple items per second.
Consistency Inherently variable and subjective; depends on individual skill, alertness, and time of day. Near-perfect repeatability; every item is inspected using the exact same criteria, 24/7.
Long-Term Cost (ROI) Low initial setup cost but high, recurring labor costs that scale with production volume. Higher initial investment but delivers strong ROI by reducing waste, recalls, and labor costs.
Data Collection Limited to manual logs; provides little to no data for broader process analysis. Automatically captures and logs detailed data on every item, enabling deep process analytics.

This data-driven summary clearly illustrates the operational differences. While the nuance of human judgment holds value, the metrics essential for modern, scaled manufacturing—speed, consistency, and data generation—are domains where automated systems excel. The debate over Machine Vision vs Human Inspection often boils down to these measurable outcomes.

Read Also: Automated Quality Control vs Manual Inspection

Data-Driven Process Optimization

A significant advantage of automated inspection, and one that is often overlooked, is its ability to transform quality control from a simple pass/fail gate into an engine for process intelligence. Systems like our AI2Eye are designed to do more than just find flaws; they capture data that can be used to optimize the entire production line.

From Defect Finding to Root Cause Analysis

Because an AI vision system logs the precise type and location of every defect, patterns begin to emerge. A recurring scratch at the same spot on multiple products can be traced back to a specific misaligned machine or a piece of faulty equipment upstream. This shifts the focus from reactively catching defects to proactively fixing the source of the problem, dramatically reducing waste and rework.

Read Also: Machine Vision for Defect Detection – Boost Product Quality

Unlocking Predictive Quality Insights

The massive dataset generated by a vision system is a goldmine for predictive analytics. By analyzing trends over time, manufacturers can identify subtle degradations in equipment performance before they lead to catastrophic failures. This enables a shift toward predictive maintenance, further increasing uptime and overall equipment effectiveness (OEE).

Toward a Hybrid Inspection Model

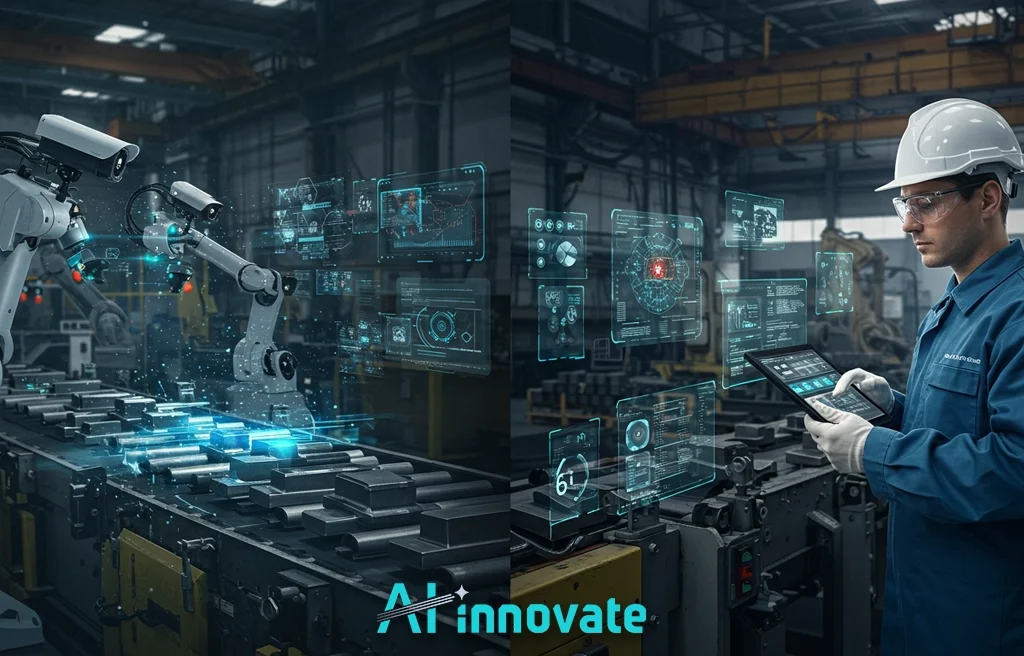
The most pragmatic and powerful approach to quality control is not an “either/or” choice but a collaborative, hybrid model. In this framework, automated systems and human experts work in synergy, each leveraging their unique strengths.

This vision moves past the confrontational framing of Machine Vision vs Human Inspection and toward a functional partnership. In this model, machine vision systems act as tireless, front-line screeners, handling the high-volume, repetitive tasks with speed and precision.

They flag potential defects and handle 100% of the routine inspections. This frees up skilled human inspectors to focus on higher-value activities: analyzing the data provided by the AI, making judgment calls on complex or ambiguous defects, managing new product introductions, and driving process improvement initiatives based on the system’s insights.

Read Also: Automated Visual Inspection – Your Path to Zero Errors

Hybrid Inspection Model

Accelerate Your Vision Development

You now have the blueprint. The next step is not just to choose a technology but to actively engineer a new standard of quality for your organization. This is where strategic vision meets practical application, and we provide the tools for this transformation.

If you are an Industrial Leader, your mandate is to build more resilient and efficient operations. Your tool is AI2Eye. Let us show you how this system will become the intelligent cornerstone of your quality assurance.

If you are a Technical Developer, your mandate is to innovate without limits. Your tool is AI2Cam. Break free from the constraints of physical hardware and accelerate your development cycle. Contact our solution architects to begin building.

Conclusion

Ultimately, the debate over Machine Vision vs Human Inspection finds its answer not in a victor, but in a powerful synthesis. The future of elite quality control lies in augmenting human expertise with the precision, speed, and data-gathering power of AI. Adopting this hybrid model is a strategic investment in creating more efficient, resilient, and intelligent manufacturing operations.

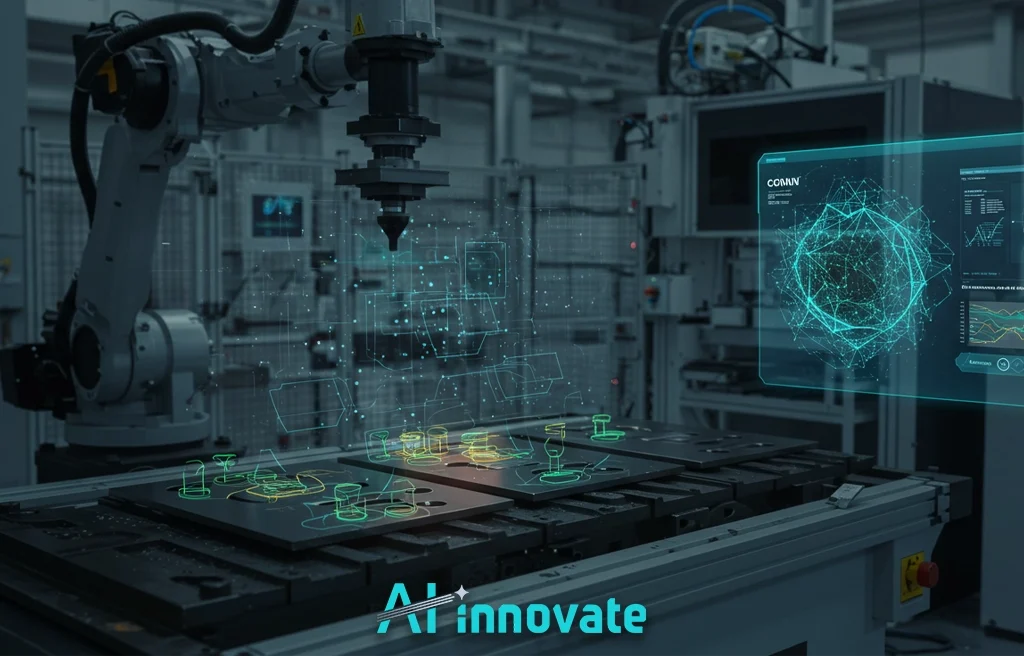
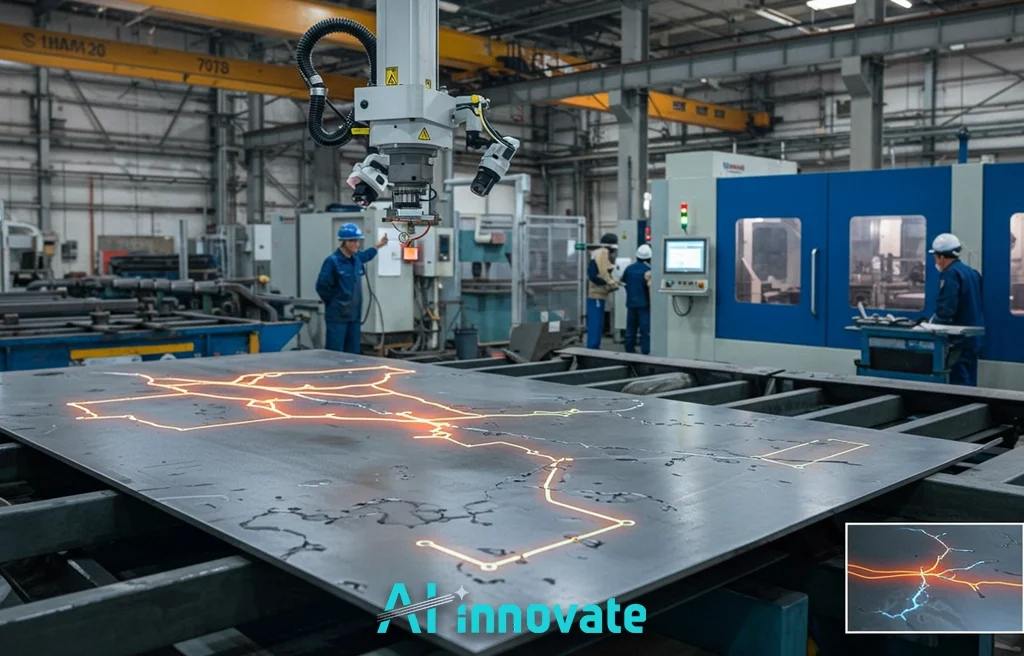
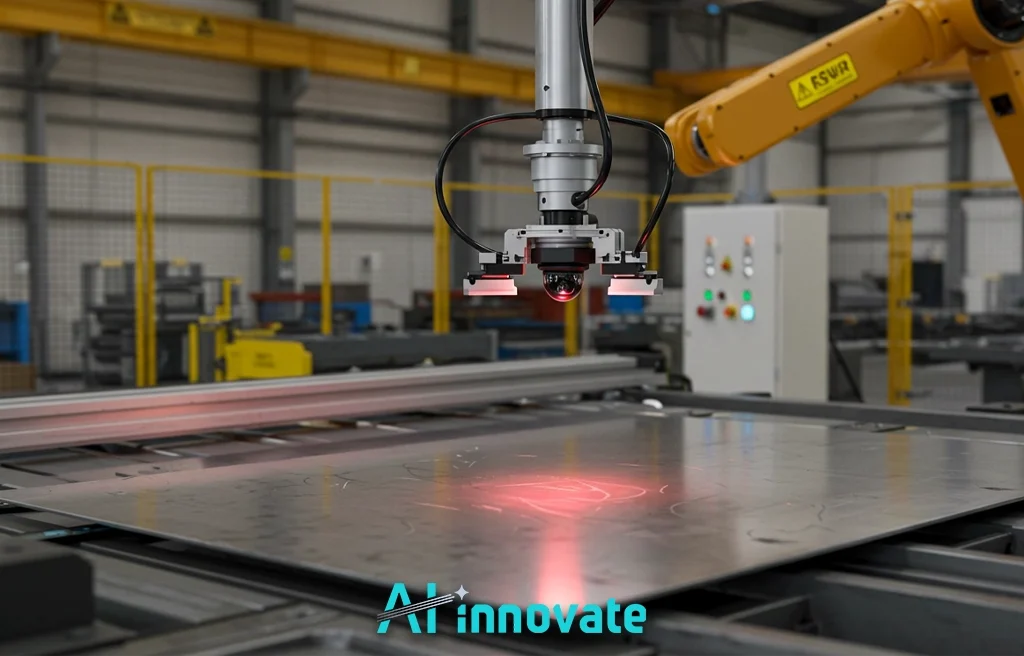
Computer Vision in Metal Quality Control

Computer Vision in Metal Quality Control – Advanced Inspection

The era of relying solely on manual quality control in metalworking is rapidly drawing to a close. As production lines accelerate and component tolerances tighten, the natural limitations of human perception become a critical industrial liability. The sector is now turning to intelligent automation to achieve a new threshold of speed and reliability.

AI-Innovate stands at the forefront of this essential transition, developing the sophisticated software that powers this next generation of industrial inspection. In this analysis, we explore the core mechanics of Computer Vision in Metal Quality Control, detailing the advanced imaging techniques and deep learning models that ensure its success.

Upgrade Your Quality Control with Machine Learning

From data to decisions – let ML handle the complexity.

The Digital Scrutiny of Surfaces

The power of modern automated inspection lies in its ability to perceive and interpret surfaces with superhuman accuracy. Unlike traditional machine vision, which typically checks for a single, predefined flaw, contemporary systems leverage deep learning.

This allows for the simultaneous detection and classification of a wide array of defects—such as cracks, scratches, and pitting—with remarkable granularity. This sophisticated analysis unfolds through a structured, multi-stage process which forms the bedrock of effective Computer Vision in Metal Quality Control. Let’s examine these critical steps.

  • Image Acquisition: High-resolution industrial cameras and sensors capture raw visual data from the metal surface under specific lighting conditions to maximize defect visibility.
  • Pre-processing: The raw image is refined. Algorithms work to remove noise, normalize lighting inconsistencies, and enhance the contrast between the flawless surface and potential imperfections. This step is crucial for reliable analysis.
  • Feature Extraction: The system intelligently identifies key visual characteristics (features) that define a defect, learning the unique signatures of different types of flaws.
  • Defect Classification: Finally, a trained AI model classifies the identified features, not only confirming the presence of a defect but also categorizing it by type and severity, providing actionable data for process improvement.

Read Also: Metal Defect Detection – Smart Systems for Zero Defects

The Digital Scrutiny of Surfaces

Imaging Techniques for Flaw Detection

A system’s analytical power is only as good as the data it receives. The choice of imaging technology is therefore fundamental to detecting specific types of flaws, especially those invisible to standard cameras.

To achieve a comprehensive inspection, a combination of advanced imaging techniques is often employed. Below, we explore a few of the most impactful methods used today.

Thermographic Imaging

This technique uses thermal cameras to detect minute temperature variations on a metal’s surface. Flaws like subsurface cracks, delamination, or inconsistencies in material density can alter heat distribution. Thermography reveals these thermal anomalies, pointing to structural defects that would otherwise go unnoticed until a potential failure.

3D Laser Scanning

For applications demanding exceptional precision, 3D laser scanners map the exact topography of a metal surface. By creating a detailed three-dimensional point cloud, these systems can identify and measure geometric imperfections like dents, warping, or scratches with micrometer-level accuracy. This is essential for high-tolerance components where even the slightest deviation is unacceptable.

X-Ray Imaging

Certain critical flaws, such as porosity or cracks within welds, are internal to the material. X-ray imaging provides a non-destructive way to see inside the metal part. By passing radiation through the component and capturing the resulting image, inspectors can identify hidden voids and internal structural weaknesses that compromise the product’s integrity.

Operational Gains Through Automation

Adopting automation is not merely a technical upgrade; it is a strategic business decision that delivers quantifiable returns. By replacing manual inspection with intelligent systems, industrial leaders can unlock significant and measurable improvements across the factory floor.

The impact spans from cost reduction to enhanced safety and productivity. The data gathered from early adopters presents a clear picture of these advantages, and the demonstrated ROI for Computer Vision in Metal Quality Control is a compelling driver for adoption.

Our own solutions have demonstrated the ability to improve operational efficiency by up to 30% and reduce production downtime by as much as 40%. The table below summarizes some of the key gains reported across the industry.

Area of Improvement Measured Impact
Inspection Time Reduction Over 60% in aluminum alloy processing
Operational Efficiency Up to 30% improvement
Production Downtime Up to 40% decrease
Worker Safety Enhanced through automated hot-spot detection

Implementation Hurdles and Costs

To build trust, it is essential to be transparent about the challenges of implementation. Adopting an automated inspection system is a significant project that comes with practical considerations. A primary factor is the initial investment. The hardware and software for a robust system can range from $10,000 to $50,000, with a typical implementation timeline of four to six weeks. This initial outlay requires careful planning and budgeting.

A more technical challenge is the acquisition of training data. AI models, particularly those based on deep learning, require a large and diverse dataset of labeled images to learn accurately. For many companies, compiling and annotating thousands of images representing every possible defect is a substantial, time-consuming task. This “data hurdle” is often one of the biggest practical obstacles to overcome when developing a system from the ground up.

A Practical Path to Automated Inspection

While these challenges are real, our solutions are designed to directly overcome them. We provide a practical, streamlined path to adopting advanced quality control, tailored to the distinct needs of both industrial managers and technical developers.

For Industrial Leaders: AI2Eye


AI2Eye turnkey system offers real-time inspection and process optimization without the long development cycle.

  • Detects surface defects on the live production line.
  • Analyzes process data to identify and resolve inefficiencies.
  • Reduces material waste and improves overall product quality.

For Technical Developers: AI2Cam

AI2Cam powerful camera emulator accelerates the development of vision applications by removing hardware dependencies.

  • Simulate any industrial camera to prototype ideas instantly.
  • Eliminate the costs of purchasing and maintaining test hardware.
  • Collaborate remotely with teams without sharing physical equipment.

Frontiers in Quality Control AI

Model Training and Validation Frontiers in Quality Control AI

Staying competitive requires an understanding of where the technology is headed. The landscape of Computer Vision in Metal Quality Control is evolving rapidly, driven by innovations that make the technology more accessible, flexible, and powerful. We are actively engaged with several key frontiers poised to reshape the industry.

  • Cloud-Based AI Platforms: Emerging platforms are democratizing access to powerful AI. Companies can leverage cloud infrastructure for model training and deployment without needing extensive in-house expertise, significantly lowering the barrier to entry.
  • CAD-Driven Inspection: New systems are being developed that use a component’s original CAD design as the baseline for inspection. This groundbreaking approach eliminates the need for training on thousands of defect images, enabling accurate quality control from the very first unit produced.
  • Generative AI for Synthetic Data: To solve the data bottleneck, companies are turning to generative AI. This technology can create vast, realistic datasets of synthetic defect images, enabling the training of highly accurate models without the time and expense of collecting real-world examples.

Read Also: AI-Driven Quality Control – Transforming QC With AI

Conclusion

The evidence is clear: the integration of automated inspection is a strategic imperative. It addresses the core industrial challenges of cost, quality, and efficiency with a level of precision and consistency that is unattainable through manual methods. For leaders in the metal industry, adopting Computer Vision in Metal Quality Control is no longer a distant possibility but a crucial step toward building a resilient, competitive, and intelligent manufacturing future.

Automated Quality Control vs Manual Inspection

Automated Quality Control vs Manual Inspection

The financial and reputational cost of a single defect escaping the factory floor can be catastrophic, leading to recalls, wasted resources, and eroded customer trust. Relying solely on manual inspection introduces a significant, unquantifiable risk into the value chain.

At AI-Innovate, we develop sophisticated AI and machine vision solutions engineered to mitigate this exact risk by delivering exceptional accuracy. This article moves past hypotheticals to deliver a frank analysis of Automated Quality Control vs Manual Inspection, focusing on ROI, error rates, and the quantifiable business case for deploying intelligent systems to protect your brand and bottom line.

Next-Level Quality Control Starts Here

Let AI inspect, analyze, and optimize – faster and smarter than ever.

The Human Factor in Inspection

For decades, the human inspector has been the cornerstone of quality assurance. The unmatched flexibility of the human eye, guided by intuition and experience, allows for the identification of novel or highly irregular defects that a rigidly programmed system might miss.

An experienced operator can assess complex surfaces and make nuanced judgments that are difficult to codify. This adaptive expertise is valuable, forming a baseline for what quality means.

However, this same reliance on human subjectivity is also a source of significant vulnerability, introducing inconsistency and fatigue-driven errors into a process that demands absolute uniformity.

Anatomy of a Digital Inspection

Anatomy of a Digital Inspection

A digital inspection transcends simple photography; it is a sophisticated cognitive process executed at machine speed. At its core, the system captures a high-resolution image, converting the physical product into a dense matrix of pixels.

This digital footprint is then instantly analyzed by an AI model, typically a deep learning neural network that has been rigorously trained on a vast dataset of both conforming and non-conforming examples.

Unlike a human, the model does not “interpret” in a subjective sense. Instead, it performs a complex mathematical analysis, comparing the product’s digital signature against its learned model of perfection.

The result is a purely objective, binary verdict—pass or fail—devoid of fatigue, bias, or inconsistency. This methodical conversion of pixels to a definitive verdict is what enables such high levels of accuracy and data generation.

Read Also: AI-Driven Quality Control – Transforming QC With AI

The Threshold of Machine Precision

Automated systems operate on a fundamentally different principle: unwavering, verifiable consistency. By leveraging AI and machine vision, these systems move past the limitations of human biology to deliver a new standard of accuracy.

When we analyze the technical debate of Automated Quality Control vs Manual Inspection, the capabilities of automation become starkly evident. To fully appreciate this shift, consider the core operational advantages these systems bring to the factory floor:

  • Perpetual Operation: Automated systems function continuously without degradation in performance, ensuring that the first and last product of a shift are inspected with the exact same level of scrutiny.
  • Unwavering Consistency: Every inspection is performed according to identical, pre-defined parameters, eliminating the variability in judgment between different human inspectors and achieving a defect detection accuracy that can exceed 99%.
  • High-Speed Throughput: Where a human may require several seconds per piece, automated stations can inspect thousands of units per minute, directly addressing production bottlenecks and scaling seamlessly with demand.

Read Also: Machine Learning in Quality Control – Smarter Inspections

Quantifiable Gaps in Manual Diligence

While the conceptual benefits are clear, the business case becomes compelling when examining the hard data. The differences in performance between the two methods are not minor; they represent a significant gap in operational efficiency, cost, and reliability.

The choice in the Automated Quality Control vs Manual Inspection dilemma directly impacts a company’s bottom line and competitive standing. The following table offers a direct comparison of key performance metrics, compiled from industry data, to illustrate the tangible gaps.

Metric Manual Inspection Automated Inspection
Error Rate 15% – 40% of defects are missed Less than 1% error rate is achievable
Annual Labor Cost Can exceed $89,000 per inspector High initial ROI via reduced labor needs
Data Traceability Manual logging; prone to error and difficult to analyze Comprehensive, real-time data capture for every item

Operational Synergy of Human and AI

The most advanced approach to quality control is not a complete replacement of human operators but a strategic collaboration between human expertise and machine precision. This hybrid model, often termed “assisted inspection,” creates a powerful synergy.

The goal is to elevate the role of the human inspector from repetitive manual labor to complex decision-making and final validation. This operational model transforms the factory floor, as explored in the following processes.

Redirecting Complexity

In this framework, our AI2Eye system handles the high-volume, repetitive task of scanning every single product for known defect types. Its speed and accuracy ensure comprehensive coverage.

However, when the system identifies a novel or ambiguous anomaly that falls outside its defined parameters, it intelligently flags and routes the item to a human expert for final assessment, ensuring that complex issues receive the nuanced judgment they require.

Human-in-the-Loop Validation

This collaborative process does more than just sort products. The feedback from the human inspector on these complex cases is fed back into the AI model. This “human-in-the-loop” validation continuously refines and improves the system’s intelligence over time. It empowers employees, builds trust in the technology, and creates an ever-smarter quality control ecosystem.

Accelerating Development without Hardware

For the technical teams driving innovation, a significant challenge in the field of Automated Quality Control vs Manual Inspection lies not just in deployment, but in development. Machine learning engineers and R&D specialists are often slowed by their dependency on physical camera hardware for prototyping and testing vision applications.

Our approach directly addresses this critical bottleneck. This is precisely the challenge our AI2Cam virtual camera emulator is designed to solve, providing a software-first environment for development. It unchains innovation from physical constraints in several key ways.

Rapid Prototyping Cycles

With AI2Cam, developers can simulate a wide range of industrial cameras and lighting conditions directly on their computer. This enables them to test and iterate on their detection algorithms almost instantly, dramatically accelerating the prototyping lifecycle without waiting for hardware procurement or setup.

Decoupling Software from Hardware

Engineers can develop and refine the core AI software in parallel with the hardware selection process. This decoupling means that by the time the physical cameras are installed on the production line, the software is already mature, tested, and ready for integration, minimizing project delays.

Flexible Scenario Simulation

AI2Cam allows developers to easily create and test for edge cases and rare defect scenarios that would be difficult, costly, or time-consuming to replicate with physical products. This ensures the final system is more robust and reliable when deployed in the real world.

ccelerating Development without Hardware

Activate Your Intelligent Production Line

Moving from traditional inspection to an automated, intelligent system is more than an upgrade—it is a strategic transformation of your production capabilities. It aligns your operations with the demands of modern industry for higher efficiency, reduced waste, and verifiable quality.

This transition begins with a practical assessment of your unique challenges. Contact our experts at AI-Innovate to explore how our AI2Eye and AI2Cam solutions can be deployed to activate a smarter, more resilient production line for your business.

Conclusion

Manual inspection, while historically significant, possesses inherent limitations that cannot be overcome through training alone. The evidence strongly indicates that automated systems offer superior accuracy, speed, and data-driven insights. The most powerful path forward lies in a synergistic combination of human and machine. Investing strategically in the transition from Automated Quality Control vs Manual Inspection is no longer an option, but a competitive necessity for any forward-thinking manufacturer.

Computer Vision Applications in Industry

Computer Vision Applications in Industry – Smarter Output

The new benchmark for operational excellence is being set by factories that can see, analyze, and act with intelligent automation. This capability is rapidly becoming the primary differentiator between market leaders and their competitors.

AI-Innovate equips industrial pioneers with the perceptual intelligence required to not just compete, but to dominate their respective sectors. This document provides a forward-looking analysis of the essential computer vision applications shaping the future of manufacturing, offering a blueprint for organizations aiming to build a decisive and lasting competitive advantage through technological leadership.

Unlock the Power of ML in Industry 4.0

Leverage cutting-edge machine learning to automate, optimize, and scale your smart factory today.


From Pixels to Production Insights

The fundamental process of turning raw visual data into strategic industrial intelligence is a structured and elegant workflow. It begins not with complex algorithms, but with the simple capture of an image, which is merely a collection of pixels.

However, it’s the intelligent processing of these pixels that unlocks immense value, allowing systems to understand and react to the physical world with precision. For any industrial leader or technical specialist, grasping this core sequence is the first step toward appreciating its power. The entire journey from a camera lens to a command on the factory floor can be distilled into four key stages:

  1. Image Acquisition: High-resolution industrial cameras and sensors capture visual data from the product or environment. This is the system’s “eyesight.”
  2. Data Pre-processing: The raw image is cleaned, normalized, and optimized. This step removes noise, corrects lighting variations, and enhances features to prepare the data for analysis.
  3. AI Analysis: Deep learning models, primarily Convolutional Neural Networks (CNNs), analyze the prepared data to identify patterns, objects, or anomalies based on their training. This is the cognitive “brain” of the system.
  4. Actionable Decision: Based on the analysis, the system triggers an action—such as diverting a faulty product, alerting an operator, or guiding a robotic arm.

Zero-Defect Manufacturing Vision

Zero-Defect Manufacturing Vision

Perhaps the most impactful application of machine vision lies in the pursuit of zero-defect manufacturing. Human inspection, while valuable, is inherently limited by factors like fatigue, inconsistency, and the sheer speed of modern production lines.

Automated quality control systems overcome these barriers by providing tireless, high-precision inspection, 24/7. This technology is a direct answer to the challenges faced by Quality Assurance Managers, offering a clear and rapid return on investment by drastically reducing scrap rates and preventing flawed products from ever reaching the customer.

An automated vision system is capable of detecting a vast array of imperfections, many of which are impossible to spot with the naked eye. Key examples include:

  • Microscopic Surface Flaws: Tiny cracks, scratches, dents, or pinholes in materials like metal, polymer, or glass.
  • Color and Texture Inconsistencies: Subtle variations in color, finish, or material texture that indicate a process error.
  • Assembly and Alignment Errors: Verifying that all components are present, correctly oriented, and assembled within specified tolerances.
  • Printing and Labeling Defects: Ensuring barcodes are readable, text is accurate, and labels are correctly positioned on packaging.

Read Also: Machine Vision for Defect Detection – Boost Product Quality

Automated Robotic Precision

In modern industrial settings, robots are the workforce, but computer vision provides the critical sense of sight that enables true autonomy and precision. Without it, a robot is limited to performing pre-programmed, repetitive motions.

With vision guidance, a robot can adapt to variability in its environment, handling tasks that require precision and flexibility. This synergy between robotics and vision is fundamental to automating complex assembly lines, especially in the automotive and electronics sectors.

For Operations Directors, this integration means higher throughput, improved product quality, and the ability to automate tasks previously deemed too intricate for machines. The value of this technology becomes even clearer when we consider how a machine “sees” and adapts to its work.

Such advancements form a core component of the wider landscape of Computer Vision Applications in Industry. The difference in capability is stark when compared directly:

Feature Traditional Robotics Vision-Guided Robotics
Component Handling Requires fixed part presentation Adapts to varying part locations
Task Flexibility Limited to one repetitive task Can switch between tasks easily
Precision Level High, but only in static setups Extreme precision in dynamic environments
Error Correction Cannot adapt to unexpected events Identifies and adjusts for errors in real-time

Supply Chain Visual Intelligence

The utility of computer vision extends far beyond the four walls of the factory floor, revolutionizing logistics and supply chain management. In massive warehouses and distribution centers, visual intelligence systems provide a level of accuracy and efficiency that manual tracking methods cannot match.

Autonomous drones equipped with cameras can perform rapid inventory cycles, scanning barcodes and QR codes from the air without human intervention. Similarly, vision-guided robots can navigate complex warehouse environments to sort, pick, and transport goods, drastically accelerating order fulfillment times and reducing labor costs.

This application delivers continuous, data-driven insights to operations leaders, optimizing stock levels, minimizing search times, and creating a more transparent and responsive supply chain. The tangible impact of these Computer Vision Applications in Industry is evident in the world’s most advanced logistics operations.

Case Study Snippet: The Amazon Model

In its fulfillment centers, Amazon deploys thousands of autonomous robots and vision systems. These technologies are not just supplemental; they are integral to the operation, enabling the company to process millions of orders daily with unparalleled speed and accuracy. The system tracks every item from arrival to dispatch, optimizing storage and retrieval routes in real time.

Proactive Workplace Safety Systems

Beyond production and efficiency, computer vision serves a vital human-centric role: creating safer industrial environments. These systems act as a vigilant, unblinking observer, capable of identifying and flagging potential hazards before they lead to accidents.

By continuously monitoring the workplace, AI-powered cameras can ensure compliance with critical safety protocols, providing a new layer of protection for employees. This addresses a core responsibility for all industrial leaders, as it reduces the risk of injury, minimizes liability, and fosters a culture of safety.

The proactive nature of these systems allows for immediate intervention when a risk is detected, a significant improvement over reactive post-accident analysis. Common scenarios where these systems are deployed include:

  • Personal Protective Equipment (PPE) Detection: Automatically verifying that all personnel in a designated zone are wearing required gear such as hard hats, safety glasses, or high-visibility vests.
  • Hazardous Zone Monitoring: Triggering an alert if a person or vehicle enters a restricted or dangerous area, such as the operational envelope of a heavy robot.
  • Ergonomic and Fatigue Analysis: Identifying worker postures or movement patterns that could lead to long-term strain injuries or detecting signs of fatigue to prevent accidents.
  • Spill and Obstruction Detection: Recognizing fluid spills or misplaced objects on the floor that pose a slip-and-fall risk.

Proactive Workplace Safety Systems

Bridging Simulation and Reality

For the Technical Developers, ML Engineers, and R&D Specialists driving innovation, one of the most significant bottlenecks is the dependency on physical hardware for development and testing. Acquiring, setting up, and maintaining a diverse range of industrial cameras and lighting conditions is both costly and time-consuming, leading to project delays.

This physical constraint often limits the scope of testing and stifles rapid prototyping. The solution is to decouple software development from physical hardware. This is achieved with sophisticated camera emulators, a type of software that acts as a virtual camera.

These tools allow developers to simulate an entire range of industrial cameras, sensors, and environmental conditions directly from their computers. By working in a virtual environment, development cycles are dramatically accelerated.

To meet this specific need, our powerful software tool, AI2Cam, provides this exact functionality. It offers a virtual camera environment designed to give developers the ultimate flexibility to innovate, enabling:

  • Faster Prototyping: Test code and ideas instantly without waiting for hardware setups.
  • Significant Cost Reduction: Eliminate the expense of purchasing and maintaining physical cameras for testing.
  • Enhanced Flexibility: Simulate countless scenarios—from different lighting to various camera models—that are impractical to create physically.
  • Seamless Remote Collaboration: Allow teams across the globe to work on the same project without shipping equipment.

The Strategic Implementation Roadmap

For industrial leaders, successful adoption of computer vision isn’t about buying technology—it’s about strategic execution. A disciplined roadmap is essential to target the right problems, avoid costly missteps, and ensure a transparent return on investment (ROI).

This approach aligns the solution with core business goals, making the real-world Computer Vision Applications in Industry both effective and accessible. We recommend these four key steps for a successful deployment:

  1. Identify the Core Bottleneck: Analyze your production line to pinpoint the single issue (e.g., defects, speed, inventory) where improvement will deliver the greatest financial impact.
  2. Gather Foundational Data: Collect a robust dataset of images and videos from the target area. This data must include clear examples of both normal operations and the specific problems you aim to solve.
  3. Select the Right Solution: Choose a tool engineered for your specific challenge. For real-time quality control, a purpose-built system like our AI2Eye integrates seamlessly into production lines, offering immediate defect detection and process analytics to deliver a clear ROI.
  4. Measure and Validate Performance: Launch a pilot project and track key metrics (e.g., defect rates, throughput, waste reduction) against your benchmarks. This validates the ROI before you commit to a full-scale deployment.

Conclusion

Computer vision is no longer a technology of the future; it is a present-day industrial reality, creating factories that are smarter, safer, and more efficient. From guaranteeing product quality with superhuman precision to guiding robots and protecting workers, its applications are both diverse and transformative.

For industrial leaders, it offers a direct path to higher quality and lower costs. For technical developers, it opens a new frontier of innovation. By embracing practical, purpose-built tools, companies can effectively implement Computer Vision Applications in Industry. AI-Innovate is committed to being your dedicated partner in this journey, transforming industrial challenges into intelligent solutions.

Surface Defect Detection Deep Learning

Surface Defect Detection Deep Learning – End Human Error

The central paradox of automating quality control presents a formidable barrier for many companies. To train an effective AI model, you theoretically need a vast and diverse library of the very flaws your efficient process is designed to eliminate. This frustrating catch-22 often leads to stalled pilot projects and the perception that viable Surface Defect Detection Deep Learning is an unattainable goal without massive datasets.

At AI-Innovate, we were founded to solve precisely these kinds of deeply-rooted industrial challenges. This article breaks down that paradox, revealing the modern techniques that turn data scarcity from a project-killing obstacle into a strategic advantage.

The Material Cost of Human Error

The reliance on manual inspection for quality control has long been the industry standard, but it carries inherent and significant costs. The process is fundamentally limited by human endurance and subjectivity.

Over a long shift, inspector fatigue naturally leads to diminished accuracy, allowing subtle but critical defects to pass unnoticed. This inconsistency translates directly into material waste, customer returns, and potential damage to brand reputation. Furthermore, the human eye, despite its capabilities, struggles to reliably detect micro-defects or imperfections on complex, reflective, or patterned surfaces.

Beyond the direct costs of scrap and rework, the operational overhead of maintaining a large team of manual inspectors is substantial. Training, managing, and scaling this workforce to meet fluctuating production demands introduces significant inefficiencies.

In high-stakes industries like automotive or aerospace, where a single missed flaw can have catastrophic consequences, the limitations of human inspection are not just a matter of cost but of critical safety.

A case study in the steel industry revealed that even highly trained inspectors could miss up to 20% of surface abnormalities during high-speed production runs, a figure that was reduced to less than 1% with an automated system. This reality makes a compelling case for a more robust, consistent, and scalable solution.

Algorithmic Eyes on the Production Line

The transition from manual inspection to automated systems marks a pivotal evolution in quality control. At its core, this shift is powered by algorithms that function as tireless, hyper-aware eyes on the production line.

Unlike human inspectors, these systems do not experience fatigue or a lapse in concentration. They are designed to perform with unwavering consistency, 24/7, scrutinizing every product with the same high degree of precision from the first unit of the day to the last.

This is where the true power of Surface Defect Detection Deep Learning begins to unfold, providing a scalable and reliable alternative. These algorithmic systems are trained on vast datasets of images, learning to distinguish between a perfect product and one with any number of flaws, often on a microscopic level.

They can identify complex patterns, textures, and subtle variations in color or topography that are virtually invisible to the human eye. This capability allows manufacturers to move beyond simply catching obvious errors.

It empowers them to identify emerging issues in the production process itself, long before they result in significant waste. By analyzing the types and frequencies of defects, the system provides actionable data, turning quality control into a proactive tool for process optimization and continuous improvement.

Core Models for Pixel-Perfect Scrutiny

To achieve this level of precision, a range of specialized deep learning architectures has been developed, each tailored for specific industrial challenges. Understanding these core models is key for any technical team looking to implement or refine an automated inspection system.

The choice of model directly impacts the system’s speed, accuracy, and its ability to handle different types of defects. To help you better understand their practical applications, let’s explore the dominant model families:

YOLO and Single-Stage Detectors

You Only Look Once (YOLO) and similar single-stage models are built for speed. They treat defect detection as a single regression problem, simultaneously predicting bounding boxes and class probabilities in one pass.

  • Strengths: Extremely fast, making them ideal for real-time inspection on high-speed production lines, such as in metal rolling or packaging.
  • Best Use Case: When the primary requirement is identifying the presence and location of defects instantly, and slight inaccuracies in bounding box precision are acceptable.

Faster R-CNN and Two-Stage Detectors

This family of models, including Mask R-CNN, operates in two stages. First, they identify regions of interest (RoIs) where a defect might be present, and then they perform detailed classification and bounding-box refinement on these regions.

  • Strengths: Offers higher accuracy, particularly for small or complex defects. Mask R-CNN extends this by providing pixel-level segmentation, precisely outlining the defect’s shape.
  • Best Use Case: For high-value products in aerospace or electronics, where precise measurement and analysis of the defect’s geometry are critical.

Read Also: Defect Analysis Techniques – From Root Cause to AI Precision

Autoencoders for Anomaly Detection

Autoencoders are unsupervised learning models trained to reconstruct “normal” or defect-free input images. When a product with a flaw is introduced, the model fails to reconstruct it accurately, and the resulting high “reconstruction error” flags the anomaly.

  • Strengths: Does not require a large dataset of pre-labeled defects. It only needs to learn what a good product looks like, which is often much easier to source.
  • Best Use Case: In scenarios with rare or unpredictable defects, or in the early stages of a product lifecycle where defect data is scarce.

From Steel Mills to Silicon Wafers

The theoretical power of Surface Defect Detection Deep Learning is best understood through its successful implementation across diverse industrial environments. These real-world applications demonstrate the technology’s adaptability and its tangible impact on quality and efficiency.

By examining how different industries have tackled their unique challenges, we can see a clear pattern of success, for instance:

Automotive Sector Applications

Manufacturers of high-gloss painted automotive parts face the challenge of detecting subtle surface flaws like “orange peel” or microscopic scratches. A case study on crown wheel inspection for the vehicle manufacturer Scania demonstrated that a YOLOv8 model, trained with as few as 20 well-prepared images, could achieve near-perfect accuracy in identifying specific manufacturing flaws, proving the power of targeted data preparation.

Steel and Metal Production

In the steel industry, high-speed production lines require immediate detection of various defects like pitting, scratches, and scale. Patented systems now use multi-stream CNNs that can simultaneously analyze the entire surface of a steel strip in real-time, classifying different types of defects and routing the data to process control systems to prevent further flawed output.

Electronics and Semiconductor Manufacturing

The production of printed circuit boards (PCBs) and silicon wafers operates on a microscopic scale, where even the smallest foreign particle can render a component useless. Here, Autoencoder models are widely used for anomaly detection.

By training the system on thousands of images of perfect PCBs, it can instantly flag any deviation, from a misplaced solder point to a minuscule crack in the substrate.

Scarcity and Imbalance in Defect Data

Despite its proven success, implementing a robust Surface Defect Detection Deep Learning system is not without its challenges. The most significant hurdles are often related to data, specifically the scarcity of defect samples and the inherent imbalance in industrial datasets.

In a well-run defect detection in manufacturing process, defects are the exception, not the rule. This creates a scenario where a model might be trained on thousands of images of “normal” products for every one image of a specific flaw, leading to a biased system that performs poorly in practice.

Compounding this problem is the difficulty of collecting a comprehensive library of all possible defects. Some flaws may occur so rarely that capturing enough examples to train a supervised model is logistically impossible.

Furthermore, new, unanticipated types of defects can emerge at any time due to changes in raw materials or machine wear. Relying solely on a library of known defects leaves a system vulnerable to the unknown, undermining its core purpose of ensuring comprehensive quality control. These data-centric challenges require a more sophisticated approach than simply collecting more images.

Bridging the Data Gap with Simulation

The most effective solution to the challenges of data scarcity and imbalance lies in simulation and synthetic data generation. Instead of waiting for defects to occur naturally, we can create them virtually.

This approach gives developers complete control over the training process, allowing them to generate vast, perfectly balanced datasets that cover every conceivable defect type, under a multitude of lighting and environmental conditions. This is where tools specifically designed for this purpose become invaluable for both developers and industrial leaders.

This is precisely the problem AI-Innovate addresses. To accelerate this process, we offer a powerful suite of tools:

  • ai2cam: A virtual camera emulator designed for developers. It allows your R&D and machine learning teams to rapidly prototype, test, and validate vision systems without any physical hardware. By simulating various cameras and conditions, ai2cam decouples software development from hardware dependency, drastically reducing project timelines and costs.
  • ai2eye: Our end-to-end quality control system for the factory floor. It integrates seamlessly into production lines, using its pre-trained models to deliver real-time defect detection and process optimization. For QA Managers and Operations Directors, ai2eye is the practical, ROI-focused application of this powerful technology, reducing waste and boosting efficiency from day one.

Read Also: Machine Vision for Defect Detection – Boost Product Quality

The Next Frontier in Automated Quality

The field of automated quality control continues to advance at a rapid pace. The next frontier is moving beyond 2D image analysis into more holistic inspection methods. Future systems will increasingly rely on 3D Data Fusion, combining traditional camera imagery with 3D scanning to understand not just the surface of a product, but also its geometry and depth.

This allows for the detection of subtle warping or dimensional inaccuracies that are invisible in a 2D plane. Simultaneously, we are seeing the rise of Self-Supervised Systems. These intelligent models are designed to learn and improve over time without continuous human intervention.

By analyzing the stream of production data, they can identify new patterns and adapt to changes in the manufacturing process, effectively “teaching themselves” to spot new types of defects as they emerge. This evolution will make quality control systems more autonomous, robust, and truly integrated into the smart factory ecosystem.

Conclusion

The integration of deep learning into surface defect detection is a proven, transformative force in modern manufacturing. It addresses the fundamental limitations of manual inspection, delivering unparalleled accuracy, consistency, and a wealth of data for process optimization. While data challenges exist, innovative tools and simulation techniques have made these systems more accessible and practical than ever. AI-Innovate is committed to delivering these advanced capabilities through both development tools like ai2cam and turnkey solutions like ai2eye, empowering companies to enhance quality and drive efficiency.

Anomaly Detection in Manufacturing

Anomaly Detection in Manufacturing – Process Insights

The vision of the fully autonomous ‘smart factory’ rests upon a single, foundational capability: a system’s capacity for precise self-awareness and self-correction. This intelligent oversight is the bedrock of future industrial efficiency and resilience, moving operations from reactive to predictive. .

AI-Innovate is dedicated to building this future, developing the practical AI tools that turn this vision into an operational reality for our clients. This article serves as a technical blueprint for this core function, dissecting the key methodologies and real-world applications that power the intelligent factory.

Defining Industrial Anomalies

An industrial anomaly is not merely any variation; it is a specific, unexpected event or pattern that deviates significantly from the established normal behavior of a manufacturing process. This distinction is critical.

While normal process variation is an inherent part of any operation, anomalies—be they point anomalies (a single outlier data point, like a sudden pressure spike), contextual anomalies (a reading that is normal in one context but not another), or collective anomalies (a series of seemingly normal data points that are anomalous as a group)—often signal underlying issues like equipment malfunction or quality degradation.

Traditional Statistical Process Control (SPC) methods, with their reliance on predefined, static thresholds, frequently fall short in today’s dynamic environments. They lack the adaptability to understand complex, multi-variable processes, making a more intelligent approach to Anomaly Detection in Manufacturing not just beneficial, but necessary for competitive survival.

Industrial Anomalies

Core Detection Methodologies

Identifying these critical deviations requires a robust set of technical approaches that have evolved significantly. While each serves a distinct purpose, they collectively form a powerful toolkit for engineers and data scientists. Understanding these core methodologies is the first step toward building a resilient production environment. The main categories are:

Supervised & Unsupervised Learning

Supervised methods are highly effective when historical data is well-labeled, allowing the model to be trained on known examples of both normal and anomalous behavior. However, the most dangerous anomalies are often the ones never seen before.

This is where unsupervised learning excels. By learning the intricate patterns of normal operation, these algorithms can flag any deviation from that learned state as a potential anomaly, making them indispensable for discovering novel failure modes.

Semi-Supervised Approaches

This hybrid method offers a practical middle ground, ideal for scenarios where only data from normal operations is abundant and reliable for training. The model builds a strict definition of normalcy and flags anything outside those boundaries.

The Power of Deep Learning

For processing the high-dimensional and complex data streams common in modern factories, such as machine vision feeds or multi-sensor arrays, deep learning models like Autoencoders are transformative. They can learn sophisticated data representations and identify subtle, non-linear patterns that are invisible to traditional statistical methods.

The Data Ecosystem for Intelligent Detection

The sophistication of any anomaly detection model is fundamentally determined by the quality and diversity of the data it consumes. Effective systems do not rely on a single data stream; they integrate a rich ecosystem of information to build a comprehensive understanding of the operational reality. This data ecosystem typically includes several core types:

Time-Series Sensor Data

This is the lifeblood of predictive maintenance and process monitoring. High-frequency data from sensors measuring temperature, pressure, vibration, and flow rates provide a granular, real-time view of machinery health and process stability.

Visual Data from Vision Systems

Image and video feeds from cameras on the production line are invaluable for quality control. They serve as the raw input for AI models designed to identify surface defects, assembly errors, or packaging inconsistencies that are often invisible to other sensors.

Contextual Operational Data

Data from Manufacturing Execution Systems (MES) or ERPs, such as batch IDs, raw material sources, or operator shift schedules, provides crucial context. Correlating sensor or visual data with this contextual information allows the system to identify root causes, not just symptoms.

Sector-Specific Anomaly Signatures

The true power of modern anomaly detection lies in its adaptability to the unique material properties and process signatures of diverse industries. The definition of an “anomaly” is not universal; it is highly contextual. An insignificant blemish on a construction material could be a critical, multi-million dollar failure on a semiconductor. Therefore, advanced systems are tuned to identify specific types of flaws across different sectors, including:

Advanced Metal and Alloy Inspection

In industries like aerospace and automotive, systems are trained to detect not only visible surface scratches or cracks but also subtle subsurface inconsistencies and micro-fractures in forged or cast metal parts by analyzing thermal imaging or acoustic sensor data.

Textile and Non-Woven Fabric Analysis

For textiles, automated visual systems identify nuanced defects that are difficult for the human eye to catch consistently during high-speed production. This includes detecting subtle color inconsistencies from dyeing processes, dropped stitches, snags, or variations in yarn thickness that affect the final product’s integrity.

Read Also: Fabric Defect Detection Using Image Processing

Semiconductor and Electronics Manufacturing

In this ultra-high-precision field, anomaly detection operates on a microscopic level. Vision systems are critical for inspecting silicon wafers, identifying minute defects in photolithography patterns or foreign particle contamination that could render an entire microchip useless.

Key Operational Applications

Ultimately, the value of these methodologies is measured by their real-world impact on the factory floor. Implementing Anomaly Detection in Manufacturing is not an academic exercise; it is a strategic tool with direct applications that yield measurable returns for Operations and QA Managers. The primary value-generating applications are:

Predictive Maintenance

By analyzing data from IoT sensors on machinery, these systems can identify the faint signatures of impending equipment failure long before a catastrophic breakdown occurs. This allows maintenance to be scheduled proactively, drastically reducing unplanned downtime—the single largest source of lost revenue for many manufacturers.

Process Optimization

Anomalies are not always related to broken equipment; they can also signal process inefficiencies. Identifying subtle deviations in parameters like temperature, flow rate, or material consistency helps engineers pinpoint bottlenecks and suboptimal configurations, enabling continuous improvement and higher overall equipment effectiveness (OEE).

Practical Integration Challenges

To build trust with technical experts, it’s essential to acknowledge that implementing these advanced systems is not without its hurdles. A successful deployment requires navigating several practical challenges. One of the most common issues is imbalanced data, where anomaly examples are exceedingly rare compared to normal operational data, making it difficult for some models to learn effectively.

Furthermore, industrial data from sensors is often noisy and requires sophisticated pre-processing to be useful. Perhaps the most significant challenge is the integration with legacy factory systems. Ensuring that a new AI solution can communicate seamlessly with existing Manufacturing Execution Systems (MES) and SCADA infrastructure is critical for creating a truly unified and intelligent operation.

Automated Visual Quality Control

Automated Visual Quality Control

Nowhere are the limitations of manual processes more apparent than in visual quality control. Human inspection is inherently subjective, prone to fatigue, and simply cannot scale to meet the demands of high-speed production.

This leads to missed defects, unnecessary waste, and inconsistent product quality, directly impacting a company’s reputation and bottom line. A robust system for Anomaly Detection in Manufacturing is the definitive solution to this long-standing industrial problem.

The goal is to move beyond human limitations with a system that is consistent, tireless, and precise. To meet this critical need, we developed a specialized solution:

A Solution for Modern Manufacturing

AI2Eye is an advanced quality control system designed specifically to automate and perfect automated visual inspection. Leveraging machine vision and AI, it operates in real-time on the production line, identifying surface defects, imperfections, and process inefficiencies with a level of accuracy that a human inspector cannot achieve.

By catching flaws early, AI2Eye drastically reduces scrap, streamlines production, and guarantees a higher, more consistent standard of quality, giving manufacturers a decisive competitive edge.

Read Also: AI-Driven Quality Control – Transforming QC With AI

Streamlining Vision System Prototyping

For the Machine Learning Engineers and R&D Specialists tasked with building these next-generation vision systems, a different set of challenges emerges. The development and prototyping lifecycle is often slowed by a critical dependency on physical hardware.

Sourcing, setting up, and reconfiguring expensive industrial cameras for different testing scenarios consumes valuable time and budget, creating project delays and limiting the scope of innovation. To remove this bottleneck, a new category of development tool is required. We offer a tool designed to address this pain point directly:

Accelerating Innovation with AI2Cam

AI2Cam is a powerful camera emulator that decouples vision system development from physical hardware. It allows engineers to simulate a wide range of industrial cameras and imaging conditions directly from their computers. The key benefits are transformative:

  • Faster Prototyping: Test software and model ideas in a fraction of the time.
  • Cost Reduction: Eliminate the need for purchasing and maintaining expensive test cameras.
  • Increased Flexibility: Simulate countless scenarios that would be impractical to set up physically.
  • Remote Collaboration: Enable teams to work together seamlessly from any location.

System-Wide Anomaly Intelligence

The ultimate goal extends beyond identifying individual faults. The future lies in creating system-wide anomaly intelligence, where data from every corner of the factory—from production lines and supply chains to energy consumption and environmental controls—is aggregated and analyzed holistically.

This integrated approach transforms Anomaly Detection in Manufacturing from a localized tool into a centralized intelligence hub. It provides a comprehensive, real-time understanding of the entire operational health of the enterprise, enabling leaders to make smarter, data-driven decisions at a strategic level and fostering a culture of true continuous improvement. This is the foundation of the genuinely smart factory.

Read Also: Smart Factory Solutions – Practical AI for Modern Industry

Conclusion

Moving from traditional monitoring to intelligent anomaly detection is a defining step for any modern manufacturer. As we have explored, this involves understanding the nature of industrial anomalies, selecting the right detection methodologies, and applying them to solve high-value problems like quality control and predictive maintenance. This strategic adoption is essential for reducing waste, boosting efficiency, and securing a competitive advantage. Companies like AI-Innovate are at the forefront, providing the practical, powerful tools necessary to turn this vision into reality.

Smart Factory Solutions

Smart Factory Solutions – Practical AI for Modern Industry

The term “Smart Factory” is often lost in a cloud of marketing hype and abstract concepts, leaving technical leaders searching for a practical starting point. Behind the buzzwords, however, lies a tangible and powerful set of operational principles and technologies with profound real-world impact.

At AI-Innovate, our focus is on this practical application, engineering solutions that solve concrete problems. This article cuts through the noise. It serves as a technical blueprint, demystifying the smart factory by focusing on its functional components, its core data logic, and the measurable performance metrics that truly matter to your operation.

Turn Your Factory into a Smart One

Let AI inspect, analyze, and optimize – faster and smarter than ever.

The Cyber-Physical Production Core

At its heart, a smart factory operates on a cyber-physical production core. This concept transcends traditional automation by creating a deeply intertwined system where physical machinery and digital intelligence are no longer separate entities. Instead, they form a cohesive, self-regulating feedback loop.

Machinery on the factory floor is equipped with sensors that generate a constant stream of data, which is then analyzed by AI algorithms to optimize performance, predict failures, and adapt to new inputs in real time.

This dynamic integration results in a production environment that is not just automated, but truly autonomous and intelligent. The key characteristics of this core are what truly differentiate it from a standard automated setup. These attributes include:

  • Real-Time Connectivity: A constant, bidirectional flow of information between machines, systems, and human operators, facilitated by the Industrial Internet of Things (IIoT).
  • Decentralized Decision-Making: Individual components of the factory can make autonomous decisions to optimize their own operations, contributing to the overall efficiency of the system without constant central oversight.
  • Self-Optimization: The system continuously learns from production data to refine processes, reduce waste, and improve output quality over time, embodying a state of perpetual improvement.

The Cyber-Physical Production Core

The Interconnected Technology Stack

A smart factory is not built on a single technology but on a sophisticated, interconnected technology stack where each layer builds upon the last to create a powerful whole. Understanding this stack is essential for grasping how data becomes insight and insight becomes action.

The foundational layers of this architecture work in concert, and I will now explore some of the most critical components of this stack:

Industrial IoT (IIoT)

This is the sensory nervous system of the factory. IIoT encompasses a vast network of sensors, actuators, and devices embedded within machinery and across the production line. These devices collect granular data on everything from temperature and vibration to material flow and energy consumption, providing the raw information that fuels the entire system.

AI-Driven Analytics

This is the brain of the operation. Artificial intelligence and machine learning algorithms process the massive datasets collected by the IIoT. They identify complex patterns, predict future outcomes (such as machine maintenance needs), and prescribe actions.

This is where raw data is transformed into strategic intelligence, making proactive and optimized production a reality. Practical Smart Factory Solutions are heavily reliant on the quality of these analytics.

Read Also: AI-Driven Quality Control – Transforming QC With AI

Digital Twins

Digital twins are virtual replicas of physical assets and processes. These simulations use real-time data from the factory floor to mirror the state of their physical counterparts. This allows operators and engineers to test new process configurations, simulate the impact of changes, and train operators in a risk-free virtual environment before implementing them in the real world.

The Industrial Data Intelligence Chain

Data is the lifeblood of a smart factory, but its true value is only unlocked when it moves through a structured “intelligence chain.” This process transforms raw, unstructured data points into actionable, strategic decisions that drive operational excellence.
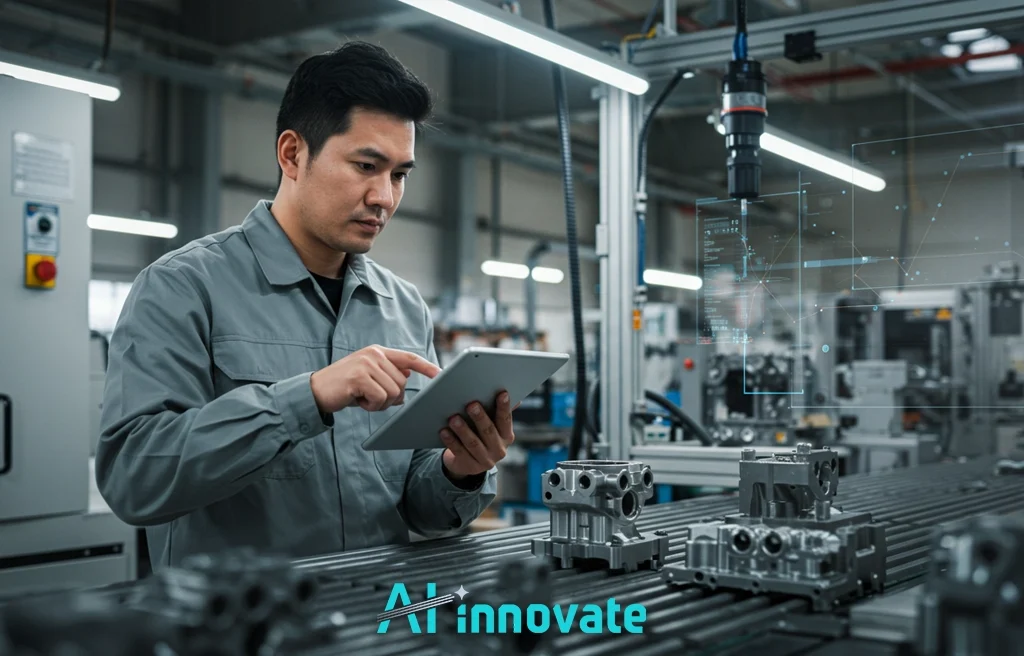
This chain is not a simple linear path but a cyclical flow of information and action. You will find that the journey of data in a smart factory typically follows four distinct stages:

  1. Data Acquisition: This initial stage involves capturing vast amounts of data from every conceivable source on the factory floor, from IIoT sensors on machinery to enterprise resource planning (ERP) systems. The focus is on gathering a comprehensive and granular dataset.
  2. Data Aggregation: Raw data is often noisy and comes in various formats. In this stage, data is cleaned, contextualized, and aggregated in a centralized repository, often a cloud-based platform, making it accessible and ready for analysis.
  3. Predictive Analysis: Here, AI and machine learning models are applied to the aggregated data to forecast future events. This can range from predicting when a specific component will fail to identifying subtle quality deviations in products before they become major defects.
  4. Automated Action: The final step closes the loop. Based on the insights generated from the analysis, the system triggers an automated response. This could be adjusting machine settings, alerting an operator to a potential issue, or even rerouting a production order.

The Industrial Data Intelligence Chain

Beyond Traditional Production Metrics

The implementation of smart factory principles allows organizations to move beyond traditional, reactive metrics and embrace a new set of benchmarks that reflect a more proactive and intelligent operational model.

While metrics like overall equipment effectiveness (OEE) remain important, they are now supplemented by more forward-looking indicators. This evolution in measurement is a core benefit of adopting advanced Smart Factory Solutions. To better illustrate this shift, let’s compare the old with the new in the following table:

Traditional Metric (Reactive) Smart Metric (Proactive)
Historical Downtime Analysis Predictive Maintenance Alerts
Post-Production Quality Checks Real-Time Anomaly Detection
Standard Energy Consumption Demand-Based Energy Optimization
Fixed Production Schedules Dynamic Resource Allocation

This shift allows QA Managers and Operations Directors to transition from a mindset of “analyze and repair” to one of “predict and prevent.” Instead of identifying defects after the fact, systems can now flag potential quality issues in real time as products move down the line, drastically reducing waste and scrap.

Similarly, predictive maintenance alerts based on a machine’s actual condition, rather than a fixed schedule, all but eliminate unplanned downtime, directly boosting efficiency and throughput.

Redefining the Operator’s Role

The rise of the smart factory does not signal the end of the human workforce; rather, it elevates it. The role of the factory floor operator is undergoing a significant transformation, evolving from manual labor to data-driven supervision.

As repetitive, physically demanding, and error-prone tasks are automated, human workers are freed to focus on higher-value activities that require critical thinking, complex problem-solving, and creativity—skills that even the most advanced AI cannot replicate.

In this new paradigm, the operator becomes a “process overseer” or a “system analyst.” Armed with intuitive dashboards and real-time data visualizations, they monitor the health of the automated systems, interpret the insights generated by AI, and make strategic interventions when necessary.

Their work becomes less about physically running the machines and more about ensuring the entire intelligent system runs smoothly and efficiently. This creates a more engaging and technically skilled workforce, fostering a culture of continuous improvement and innovation from the ground up.

Applied AI on the Factory Floor

Translating the concepts of a smart factory into tangible results requires specialized, purpose-built tools that bridge the gap between data and action. Effective Smart Factory Solutions are not one-size-fits-all;

they are targeted technologies designed to solve specific, high-stakes industrial challenges. At AI-Innovate, we develop such practical tools for both industrial leaders and technical developers. To provide a clearer picture of how this is achieved, let’s explore our core product offerings:

AI2Eye: Intelligent Vision in Action

For QA Managers struggling with the high cost and inconsistency of manual inspection, AI2Eye offers a direct solution. It is an advanced AI-powered machine vision system that automates real-time quality control directly on the production line.

By identifying subtle surface defects and process inefficiencies that the human eye can miss, AI2Eye provides an immediate and clear ROI. Its core benefits include:

  • Drastic Waste Reduction: Catches defects early to minimize scrap.
  • Enhanced Process Efficiency: Analyzes production data to identify and remove bottlenecks.
  • Guaranteed Quality Standards: Ensures every product meets the highest quality specifications.

AI2Cam: Accelerating Vision Development

For ML Engineers and R&D Specialists, the reliance on physical hardware can create significant project delays. AI2Cam is a powerful camera emulator that decouples software development from hardware dependency.

It allows developers to simulate a wide range of industrial cameras and imaging conditions directly from their computers, empowering them to build, test, and prototype machine vision applications faster and more cost-effectively than ever before. This is the kind of practical tool that is vital to the ecosystem of Smart Factory Solutions.

For teams looking to implement or accelerate their machine vision projects, exploring these tools can provide a significant competitive advantage. We encourage you to review their technical specifications to see how they can directly address your operational and development challenges.

The Autonomous Production Horizon

Looking forward, the trajectory of smart factory development points toward a horizon of near-total autonomy. The ultimate vision is the “lights-out” factory—a facility that can run independently, 24/7, with minimal human intervention.

While we are not there yet, the building blocks are already in place. The next evolution will see the integration of entire supply chains, with factories that can automatically adjust production based on incoming orders, material availability, and even real-time market demand.

We can expect to see self-optimizing networks where smart factories communicate with each other and with suppliers and logistics partners to create a seamless, hyper-efficient production ecosystem.

This will enable mass personalization at scale, where products are manufactured to individual customer specifications with the efficiency of mass production. This future is not a distant dream; it is the logical next step in the journey of industrial digitalization, and the Smart Factory Solutions of today are paving the way for the autonomous operations of tomorrow.

Cybersecurity and Data Privacy: Protecting the Heart of Smart Factory Solutions

In today’s connected world, the same technology that makes smart factory solutions powerful also brings new risks. A modern smart factory connects machines, sensors, cloud systems, and AI tools, all sharing important data in real time. This constant flow of information helps the factory work faster and smarter, but it also creates more chances for cyberattacks.

Keeping a smart factory safe means building strong protection at every level. On the factory floor, dividing networks into separate zones and using “zero-trust” security can stop attackers from moving freely if they get in. For the data itself, using encryption, secure logins, and constant monitoring helps make sure the information stays accurate and private. It’s also important to follow privacy laws, like GDPR or CCPA, from the start, not as an afterthought.

One weak sensor, an outdated security patch, or a wrongly set firewall could shut down production, break important systems, or damage the company’s reputation.

That’s why modern smart factory solutions are making cybersecurity part of their design from day one. Tools like AI-based threat detection, automated responses to attacks, and real-time monitoring are now just as important as predictive maintenance or quality checks. By taking security seriously, companies can enjoy all the benefits of smart factory solutions, while protecting their data, keeping production running, and maintaining customer trust.

Conclusion

The smart factory represents a paradigm shift in manufacturing, moving from siloed automation to a deeply integrated, data-driven, and intelligent ecosystem. It is not just about technology; it is about fundamentally changing the way production is managed, measured, and optimized. Adopting these principles is no longer a choice but a competitive necessity in the global marketplace. As a strategic partner in this transformation, AI-Innovate provides the practical, powerful AI tools needed to turn this industrial vision into a reality, ensuring your operations are not just smarter, but also more efficient and resilient.

Automated Visual Inspection

Automated Visual Inspection – Your Path to Zero Errors

Every defective product that leaves a factory represents a failure—a failure of process, of oversight, and of technology. Manual inspection, constrained by human limitations in speed and consistency, is often the weakest link in the quality chain. This gap is where costly errors and brand damage originate.

AI-Innovate was founded to close this gap with intelligent, practical vision solutions. This article directly addresses the inherent flaws of manual oversight and provides a detailed exploration of Automated Visual inspection as the definitive solution, detailing the technology, applications, and strategies required for achieving zero-defect manufacturing.

Automated , Accurate , Always-On

Replace human fatigue with 24/7 AI inspection.

Core Principles of Automated Inspection

At its heart, an Automated Visual Inspection system digitizes and scales the process of human sight, executing its task with superior speed and consistency. The entire operation, from capturing an image to rendering a final verdict, is a systematic and near-instantaneous process.

To truly understand its power, it’s essential to break down its operational sequence into its fundamental components. This workflow consists of four distinct, sequential stages that work in concert:

  1. Image Capture: The process begins when high-resolution industrial cameras or sensors capture detailed images of a product or component, typically as it moves along a production line. Proper lighting is crucial at this stage to illuminate defects without creating shadows or glare.
  2. Image Processing: Sophisticated algorithms then process the captured image. This is not merely about seeing a picture, but computationally analyzing it to enhance features, identify patterns, recognize shapes, and segment distinct regions of interest.
  3. Comparison: The processed digital image is meticulously compared against a predefined standard or a “golden reference”—a digital model of a perfect product. This comparison checks for any deviations, from minute surface scratches to significant dimensional inaccuracies.
  4. Decision-Making: Based on the outcome of the comparison, the system makes a binary decision in real-time. The product either meets the quality threshold and passes, or it is flagged for rejection, rework, or further analysis. This immediate feedback loop is what makes the system so effective in a high-volume setting.

Core Principles of Automated Inspection

The Sensory Spectrum in Visual Inspection

The effectiveness of any visual inspection system is fundamentally dependent on the quality of its input, which begins with the specialized cameras and sensors that serve as its eyes. The choice of sensor is not a one-size-fits-all decision;

it is dictated by the specific nature of the product, the types of defects being targeted, and the unique conditions of the factory floor. Let’s explore some of the key imaging technologies that form the sensory backbone of modern AVI:

Infrared (Thermal) Cameras

These cameras detect temperature variations instead of visible light, making them invaluable for identifying issues that are invisible to the naked eye. By capturing an object’s heat signature, they can pinpoint faulty components that are overheating or imperfections in packaging seals.

3D Cameras and Depth Sensors

Moving beyond a flat, two-dimensional view, 3D cameras create a complete topographical map of a product’s surface. This allows the system to measure not just length and width, but also depth, contour, and volume, making it essential for verifying the precise shape and dimensions of complex mechanical parts.

Hyperspectral Cameras

Hyperspectral imaging captures data across hundreds of narrow spectral bands, far beyond the red, green, and blue receptors of human vision. This technology can identify materials based on their unique spectral signature, a capability used in agriculture to detect crop disease or in food processing to identify foreign contaminants.

Laser Sensors

For applications requiring extreme precision, laser sensors provide highly accurate dimensional measurements. They are used to measure profiles, verify the alignment of components, and ensure that machined parts meet exacting tolerances.

Sensor Type Primary Function Key Industrial Application
Infrared (Thermal) Detects temperature variations Electronics (overheating circuits), Packaging (seal integrity)
3D & Depth Sensors Measures shape, dimension, and volume Automotive (body panel fit), Aerospace (component verification)
Hyperspectral Identifies materials by spectral signature Agriculture (crop health), Food Safety (spoilage detection)
Laser Sensors Provides high-precision dimensional data Manufacturing (part measurement), Robotics (positional guidance)

From Programmed Logic to Adaptive Learning

The traditional approach to automated inspection, often known as Automated Optical Inspection (AOI), historically relied on rigid, rule-based systems. These systems were programmed with a fixed set of parameters to define a defect—for example, any scratch longer than 2mm was a flaw.

While effective in highly controlled environments, this method proved brittle. It struggled to adapt to natural variations in texture, lighting fluctuations, or the introduction of new, undefined defects, often resulting in high rates of false positives.

A more advanced paradigm, AI-based automated visual inspection, transcends these limitations by incorporating machine learning. Instead of being explicitly programmed, the system learns to identify defects from a “defect library” of example images.

This adaptive learning approach allows the system to distinguish between acceptable cosmetic variations and genuine functional flaws with a level of nuance that mirrors, and often exceeds, human judgment. The benefits of this modern approach are transformative:

  • Superior Defect Detection: AI models excel at identifying complex and subtle defects that are difficult to define with simple rules, leading to higher accuracy and fewer missed flaws.
  • Reduced False Positives: The system learns to tolerate acceptable process variability, significantly reducing the number of good products that are incorrectly rejected.
  • Scalability and Adaptability: An AI system can be continuously retrained and updated with new data, allowing it to adapt to new product lines or evolving defect classifications without needing a complete reprogramming.

Read Also: Defect Detection in Manufacturing – AI-Powered Quality

Generative AI: Human-in-the-Loop Defect Synthesis

The next leap for Automated Visual Inspection is not just detecting defects, it is manufacturing them in a virtual space before they ever exist in reality. Generative AI now enables the creation of hyper-realistic defect images, from hairline fractures to complex structural distortions, without depending solely on rare faulty parts. When guided by seasoned quality engineers in a human-in-the-loop process, these synthetic defects carry both the precision of machine-generated detail and the nuance of human judgment.

This approach directly addresses one of the most persistent challenges in Automated Visual Inspection: the scarcity of defect data in high-quality manufacturing. By simulating even rare, safety-critical anomalies at scale, teams can build balanced, high-diversity training datasets without halting production or risking damage to actual components.

With synthetic defect libraries in place, inspection systems can be retrained the moment a new product variant or manufacturing method is introduced. Instead of waiting months to gather real-world defect samples, engineers can anticipate potential failure modes, generate thousands of examples overnight, and push updated models into production almost immediately.

In this way, Automated Visual Inspection shifts from a reactive checkpoint to a forward-looking design and process control tool, catching the flaws of tomorrow before they ever have a chance to leave the factory floor.

High-Stakes Industrial Applications

The true value of automated visual inspection is most evident in industries where the margin for error is virtually zero. In these high-stakes environments, the technology is not a luxury but a core component of quality assurance and regulatory compliance.

  1. Pharmaceuticals: In pharmaceutical manufacturing, the sterility and integrity of products like vials, syringes, and ampules are paramount. AVI systems are deployed to scan for minuscule particulate matter, cracks in the glass, or improper seals that could compromise patient safety, all while operating at speeds that manual inspection could never achieve.
  2. Aerospace & Automotive: For industries that build complex machines like airplanes and cars, structural integrity is a matter of life and death. Here, 3D and laser-based inspection systems verify the precise dimensions of millions of components, from engine parts to body panels, ensuring every piece conforms to exact design specifications.
  3. Electronics: The production of semiconductor wafers and printed circuit boards (PCBs) involves features measured in micrometers. AVI systems are indispensable for detecting flaws like broken traces, misplaced components, or soldering defects that are too small for the human eye to consistently see.

Operational Realities and Implementation Hurdles

While the benefits are clear, integrating an automated visual inspection system is a significant undertaking that requires careful planning. Success is not guaranteed by simply purchasing a camera and software; it depends on addressing several key operational realities. Prospective adopters should be prepared for the following hurdles:

  1. Initial Investment: The combination of specialized hardware (cameras, lighting, optics) and sophisticated software represents a considerable upfront capital expenditure.
  2. Data Quality and Quantity: AI-based systems are data-hungry. Acquiring a large, accurately labeled dataset of both good and bad products to train the model can be a time-consuming and resource-intensive process.
  3. Lighting and Environmental Control: The performance of any vision system is highly sensitive to lighting. Developing a robust solution requires controlling ambient light and engineering a setup that consistently illuminates the features of interest without creating confounding shadows or reflections.
  4. System Maintenance and Calibration: Like any high-precision instrument, an AVI system requires ongoing maintenance and periodic recalibration to ensure its accuracy and reliability over time.

Accelerating Innovation with Camera Emulation

The wide variety of specialized sensors required for different inspection tasks presents a major bottleneck for the engineers and R&D specialists tasked with developing new vision applications. Acquiring, setting up, and reconfiguring diverse and expensive physical camera hardware for prototyping is a slow, costly, and inefficient process. It can stifle innovation and significantly delay project timelines.

This is precisely the challenge that virtual camera tools are designed to solve. AI-Innovate’s AI2cam is a powerful camera emulator that allows developers to simulate a wide range of industrial cameras and imaging conditions directly from their computer.

By decoupling software development from physical hardware, teams can build and test their applications faster, more affordably, and with greater flexibility. With a tool like AI2cam, engineers can rigorously test their algorithms across various scenarios before a single piece of hardware is purchased, empowering remote collaboration and accelerating the entire development lifecycle.

Accelerating Innovation with Camera Emulation

From Data Points to Intelligent Manufacturing

Ultimately, the most advanced application of automated visual inspection moves beyond simply accepting or rejecting individual products. The true transformative power of this technology lies in its ability to convert a stream of images into a rich source of actionable data.

Each detected defect is a data point that, when aggregated and analyzed, can reveal hidden patterns of inefficiency within the entire manufacturing process. This is where a solution like AI-Innovate’s AI2eye comes in. It doesn’t just find flaws;

it serves as an intelligent set of eyes on the factory floor, providing data-driven insights to optimize the entire production line.  By identifying exactly where and when certain defects occur, AI2eye helps quality managers and operations directors move from a reactive to a proactive approach.

This enables them to address the root causes of problems, streamline workflows, reduce material waste, and boost overall efficiency, turning the quality control station into the data-driven nerve center of a truly intelligent manufacturing operation.

Read Also: AI-Driven Quality Control – Transforming QC With AI

Conclusion

The era of subjective, manual inspection is definitively closing. As we’ve explored, the convergence of high-fidelity sensors and adaptive AI provides a solution that operates at the speed of modern production with uncompromising precision. Automated visual inspection is therefore not merely an upgrade but a fundamental redesign of quality assurance. It establishes a new baseline for operational excellence, shifting quality from a goal to a guaranteed, embedded characteristic of every product that leaves the factory line, ensuring unshakable consumer trust.